четверг, 29 октября 2009 г.

DIY Door Shelf TUTORIAL

DIY Door Shelf TUTORIAL

{happy wednesday, crafters!} Hope your week is going wonderfully. Today I am showing off my corner shelf made from an old door. My corner door shelf is one of my all time favorite pieces of furniture!


DIY Corner Door Shelf
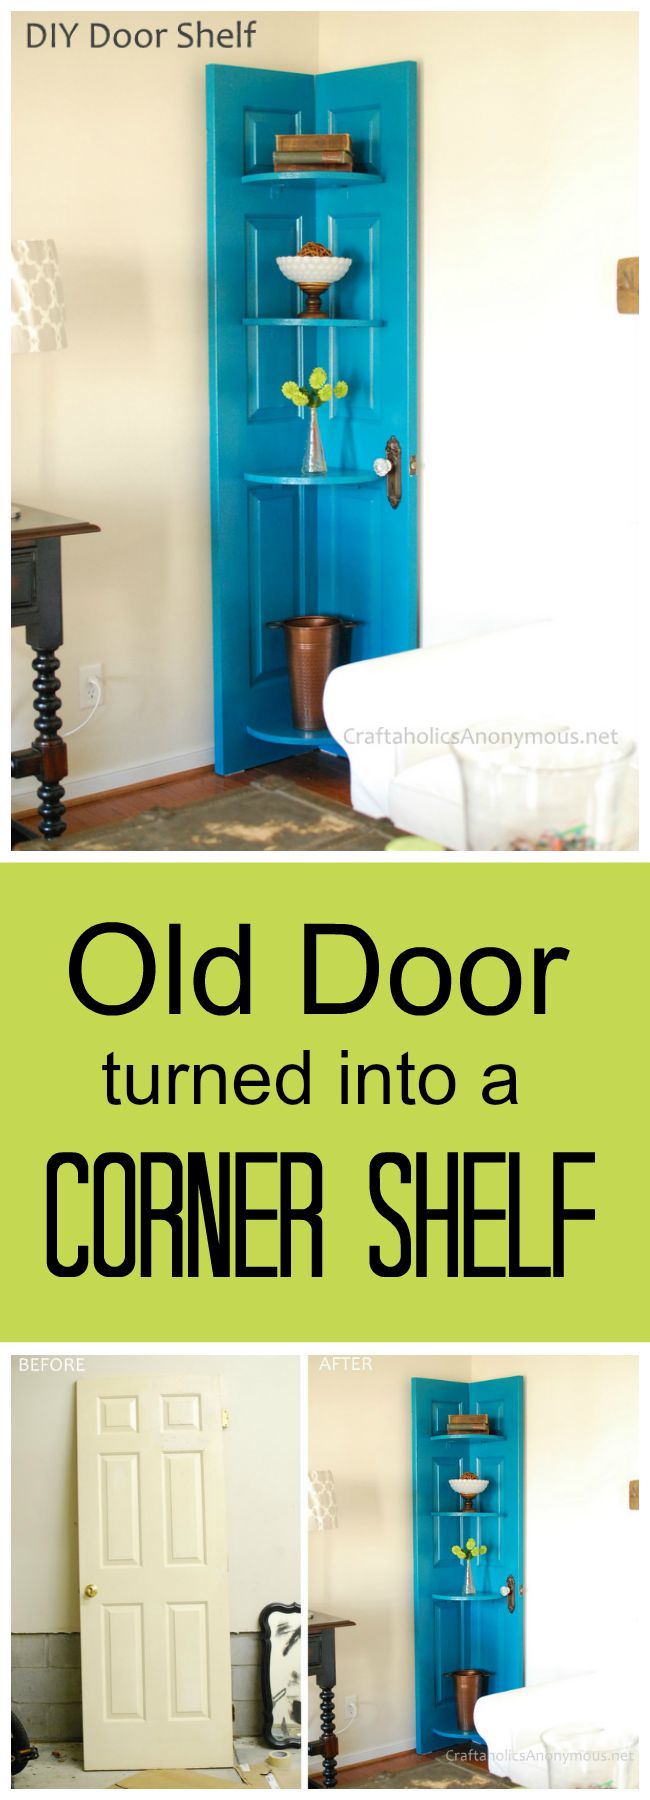

DIY Door Corner Shelf tutorial :: How to turn a door into a corner shelf
Save

Davis and I made this about 5 years ago when we bought our first home. {sweet memories} Originally, I painted the door shelf an off white with a brown wash over it. {you can see my original picture of the corner shelf here. my style has changed a lot since then….as has my photog skills lol} I recently gave my corner door shelf a makeover with a coat of turquoise spray paint…..


Door turned into a Corner Door Shelf
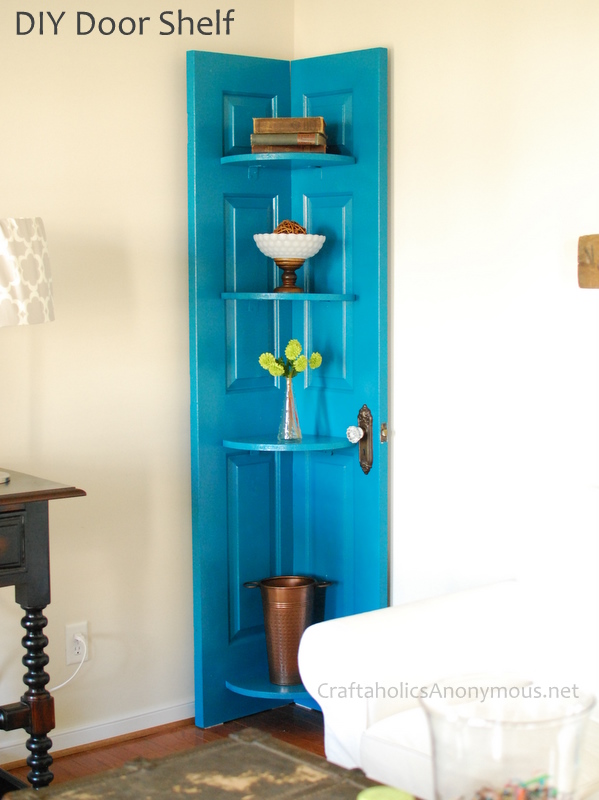

corner door shelf
door turned into a shelf. Brilliant!

Its right at home in my Sitting Room! I’m doing turquoise and lime green in there and I’m using my shelf made from a door as the focal point/statement piece…..And it kinda rocks at both jobs! I’m still debating whether I should do a dark wash over the turquoise or not. Not sure if it will go with the modern-vintage look I’m going for in the room.


***will post pics of my Sitting Room when its done!***


added later: you can see my entire front room here.
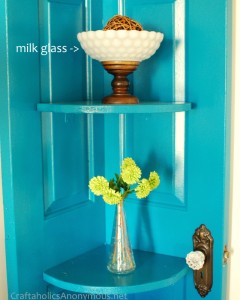

corner shelf made from a door
old Door turned into a corner shelf. how awesome is that?!

Of course I used milk glass to accessorize it! the lime green flowers in a bud vase totally pop. So lively and fun!
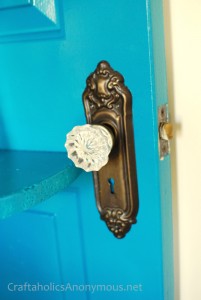

antique door knob
I changed out the door knob with a vintage replica….and its sort of the frosting on the cake.

Corner Door Shelf


how to make a corner shelf
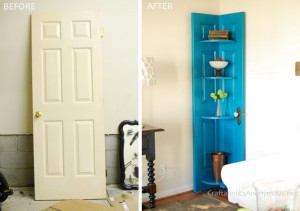
Here is the before and after picture. Kinda crazy, huh? One of my all time fave projects!

How to make a Door Shelf


supplies: door, circular saw, screw driver, screws, 13-90 degree metal L brackets, sand paper, door knob.


  1. First, we cut the door in half using a circular saw. {draw lines and measure twice!}
  2. Secure the two door pieces to be at a 90 degree angle using clamps and a helper. {i was the helper :)
  3. Screw in 5-90 degree metal brackets to the back to hold the 2 pieces together.
  4. Cut 4 shelves out of particle board to fit the measurements of your door. {note: we rounded the outer edge of the shelves, but you could leave them square.}
  5. Secure the shelves in place using 2-90 degree metal brackets under each one.
  6. Sand any rough edges with 200 grit sandpaper.
  7. Change the door knob, if desired. TIP: I recommend only putting one side of the door knob on so that the corner shelf can sit flush with the wall. Otherwise, you would have to leave room between the wall and shelf to allow for the knob.
  8. Paint and distress the door as desired. {I used 2 cans of turquoise spray paint for mine}

So that’s how we made my corner shelf. I love this piece! Its so cool and I still get loads of compliments on it. I think it would be cool to get different old doors and turn them into shelves like this. think of all the cool door designs! So many possibilities.


If you make a door shelf, I would love to see a picture!


happy crafting, linda


Original article and pictures take cf.craftaholicsanonymous.net site
среда, 28 октября 2009 г.

Diy Dollhouse Bookshelf

Diy Dollhouse Bookshelf

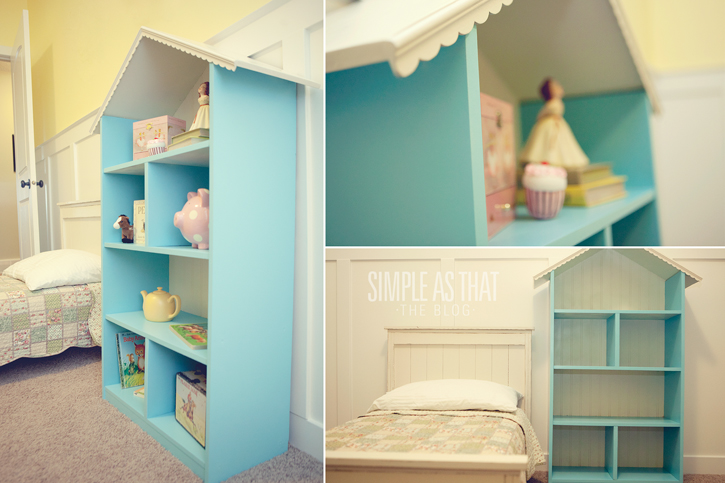
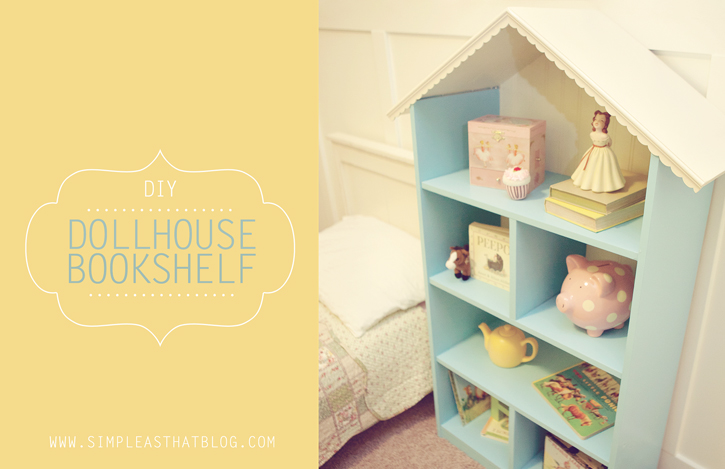
I’ve been so excited to share this little project that my husband and I have been working on for the past week. We converted this bookshelf from Wayfair into a dollhouse/bookshelf for our two youngest girls for Christmas and I just love how it turned out! We’ll be adding dollhouse furniture to it and they’ll use it as a dollhouse, but I think it looks so great as a bookshelf too!


As part of the Wayfair DIY blogger challenge we were given our choice of three different products to transform and we chose this 3 tiered bookshelf. I new exactly what I wanted to do with it before it even arrived and I was super excited to get to work!


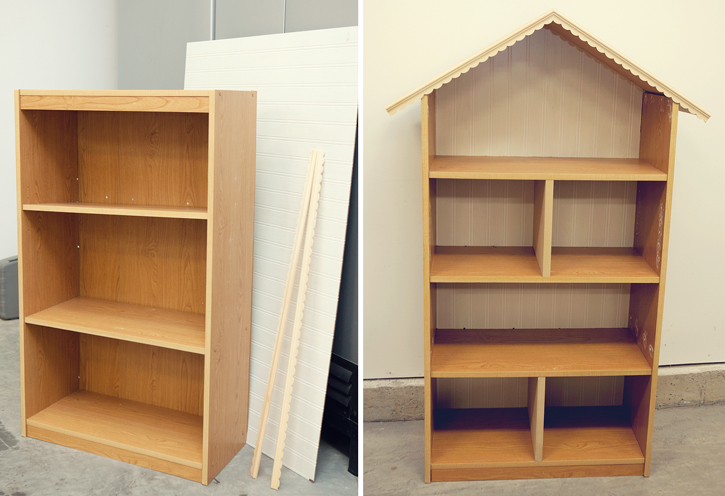
We loosely assembled the bookshelf as we decided exactly how to go about transforming it into a dollhouse. Once we’d decided on a plan of action we got to work and in just a couple of hours we went from this, to this:


Here’s how we did it


We moved each of the shelves on the bookshelf down a few inches so there wouldn’t be any wasted space between the roof and the first shelf. This was a great way to add one more level to our dollhouse creating some extra play room. Use wood glue and spax screws or brad nails to attach shelves.


We then used some scraps of MDF to create the roof and inside partition walls and attached some scallop edging that I purchased at Michael’s to finish off the edge of the roof. We switched out the original backing of the bookshelf with a sheet of wainscot panel.


To save yourself some work taping and masking things off when it comes to final painting, I’d recommend painting the backing and the shelf separately before assembling. I just might be speaking from experience here.


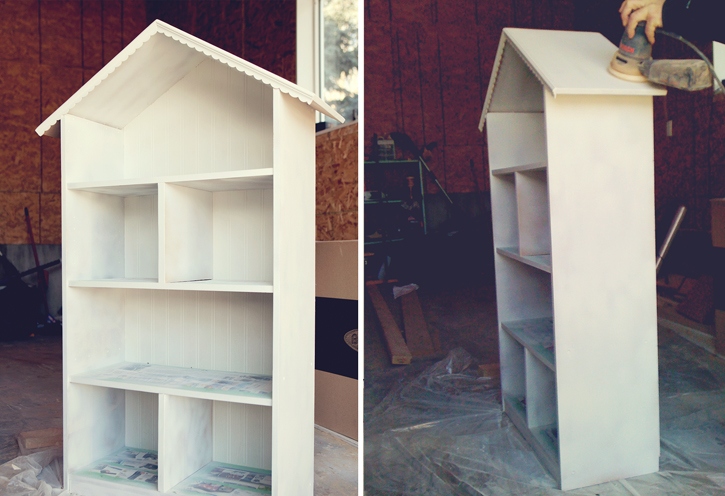
After filling all the holes and lots of sanding, we were ready to give it a coat of primer. We masked off the top of the laminate shelves because I thought they’d look cute as faux hardwood floors in our little dollhouse. We used KILZ primer and it worked great! After some more sanding we were then ready to move on to painting. We used Rust-Oleum satin spray paint on the whole dollhouse and I’m really happy with the finish.


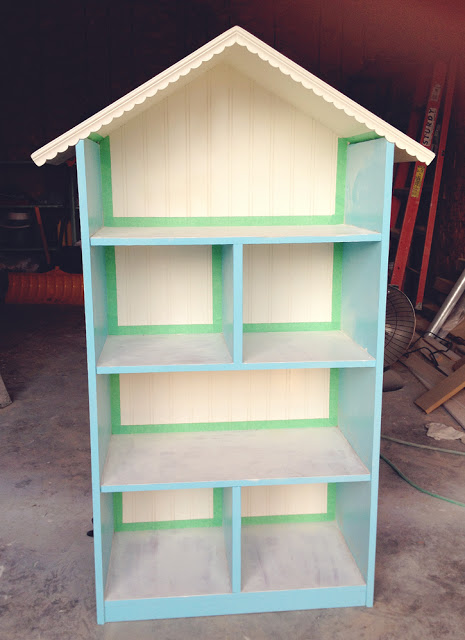
We used aqua for the shelves, antique white for the backing and grey for the roof. Once we were done it just didn’t look quite right. Those faux laminate floors that I thought would look so cute, didn’t, and the grey roof was just too dark for the rest of the house so we gave it another try. After sanding down the top of the shelves and roof we masked things off again and began repainting. We painted the roof antique white and all of the shelves aqua. It turned out so much better and I’m really glad we took the time to repaint even though it took us much longer than anticipated to finish the project because of it. After our painting mishap I learned that its best to keep your colour palette simple.You can scroll down for a few pictures of the final product. I’ve photographed it as a bookshelf, but as mentioned, we’re going to be giving it to our girls for Christmas along with some darling little furniture

so they can use it as a dollhouse. Either way it is cute, cute, cute and our painting mishap aside, it was a relatively straight forward project that can be put together in a week or less. With the repainting on our dollhouse it took us 1 week + 1 day to finish. Total cost {minus the extra paint we had to buy} was the cost of the bookshelf + $50.00 in supplies {spray paint, primer, scallop edging, wainscot panelling} not including things we already had on hand {MDF scraps, wood filler, wood glue, nails/screws, sand paper}.


If you enjoyed this post you might like these other craft + DIY projects from Simple as That:


Original article and pictures take simpleasthatblog.com site
вторник, 27 октября 2009 г.

DIY Diagonal Base Farmhouse Console Table

DIY Diagonal Base Farmhouse Console Table

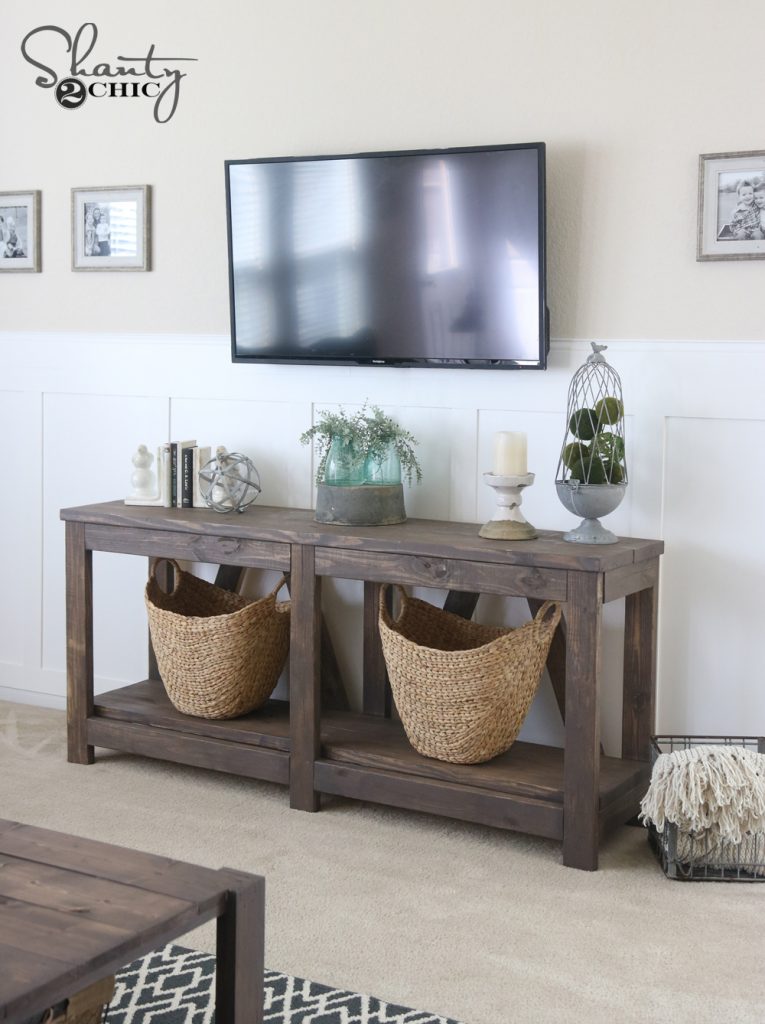
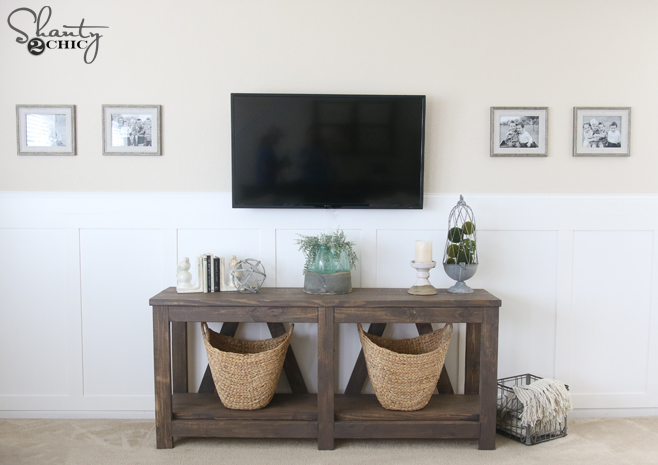
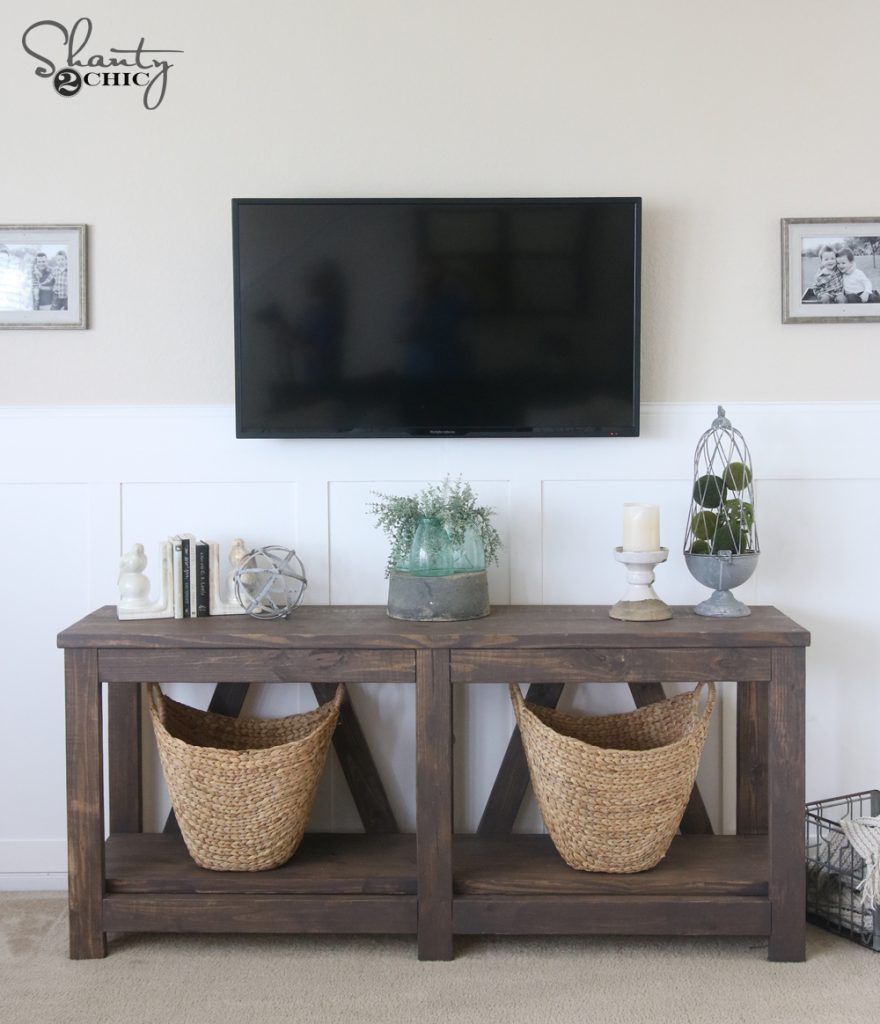
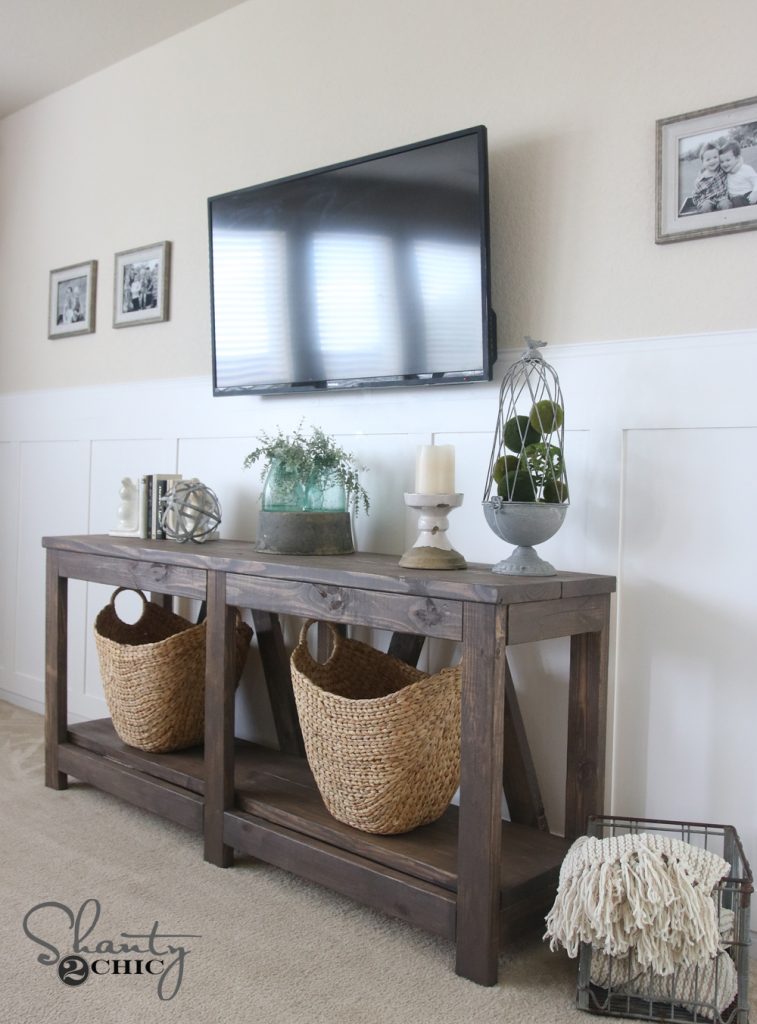
Oh hey guys! Happy Friday! As many of you may know, Ash and I took a little road trip to our sister’s house near Houston over the Summer and crashed her living room. We built her several new pieces and helped make her house feel more like a home…. It was so much fun. Today I am sharing a console table I built her for under her TV. This has great open shelving for baskets under to hide toys or blankets or whatever you like to throw into a basket… Check out her new Diagonal Base Farmhouse Console Table!


Isn’t she pretty? Don’t be fooled though! This thing is a beast in size! The entire thing is built with 2x framing lumber so Ash and I did a little weightlifting getting it into the house after I finish it.


I will walk you through the entire build below. You can also download and print the FREE PLANS by clicking HERE!


Here is the supply list for this table… 11 boards people! Lumber cost was around $50 people!


supply-list-for-table
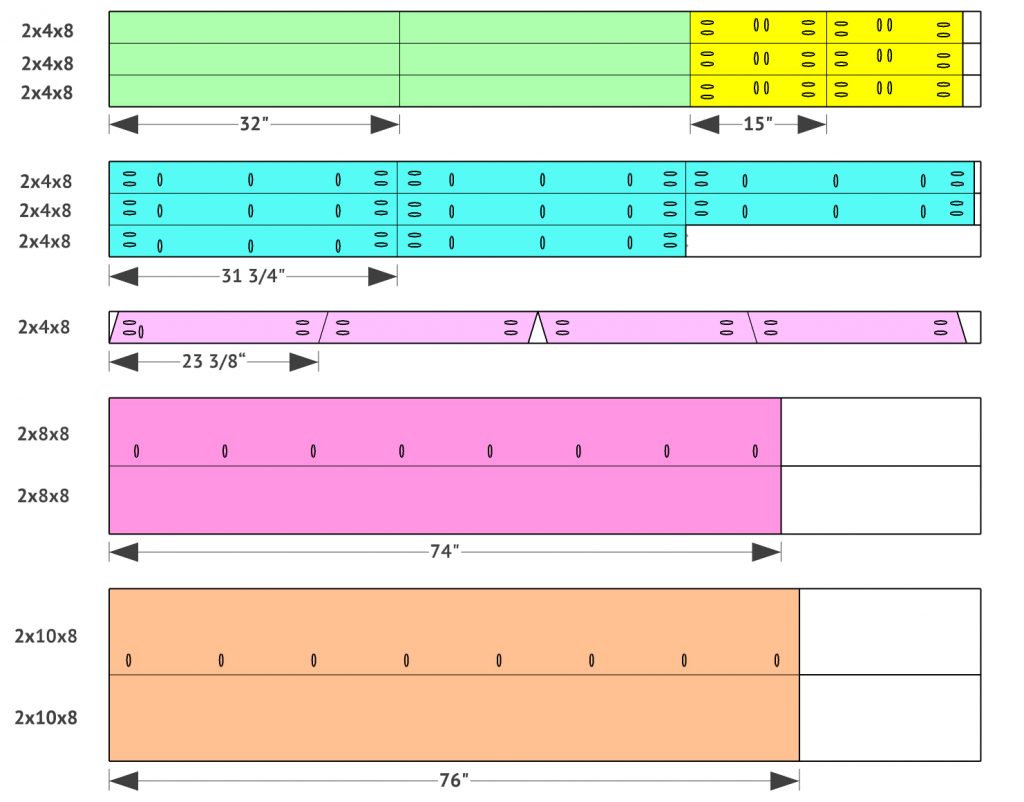
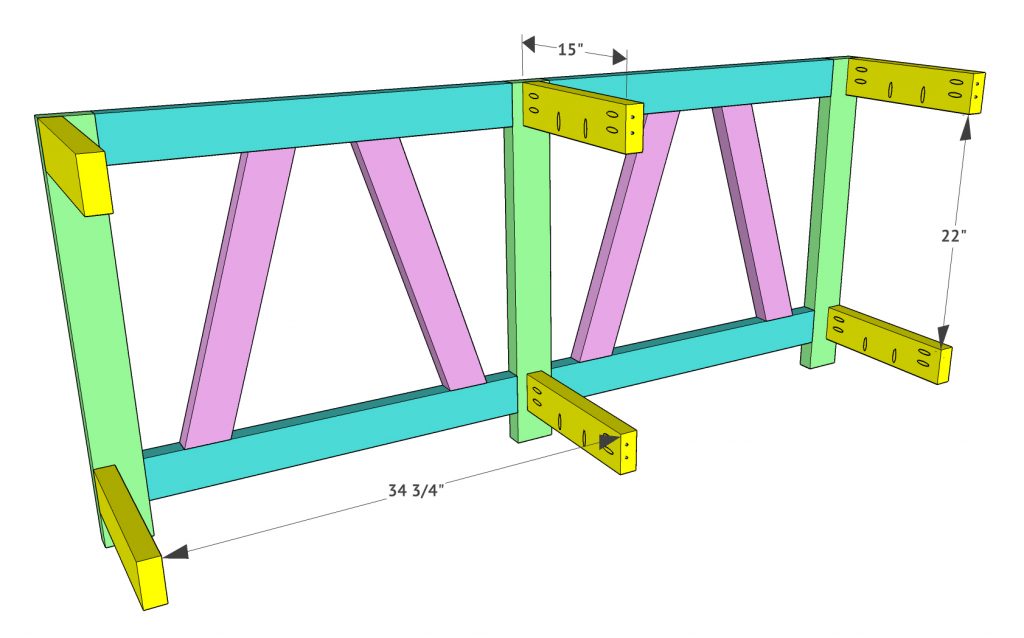
And here is a shot of the cut list… Remember! It’s best on lots of parts to cut as you go to get perfect measurements.

cut-list-table

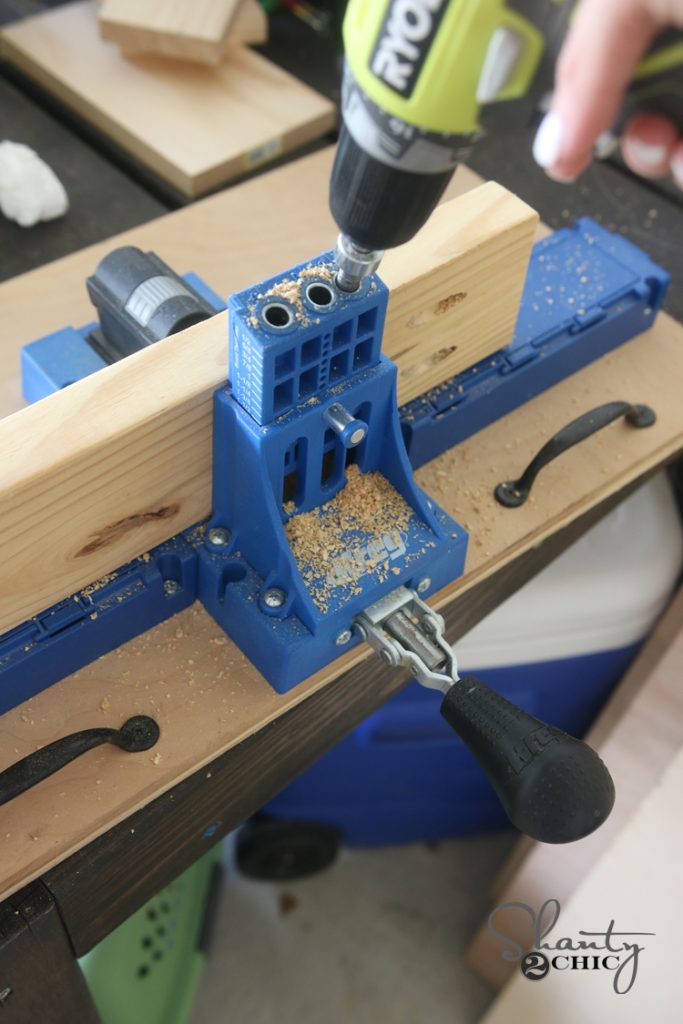
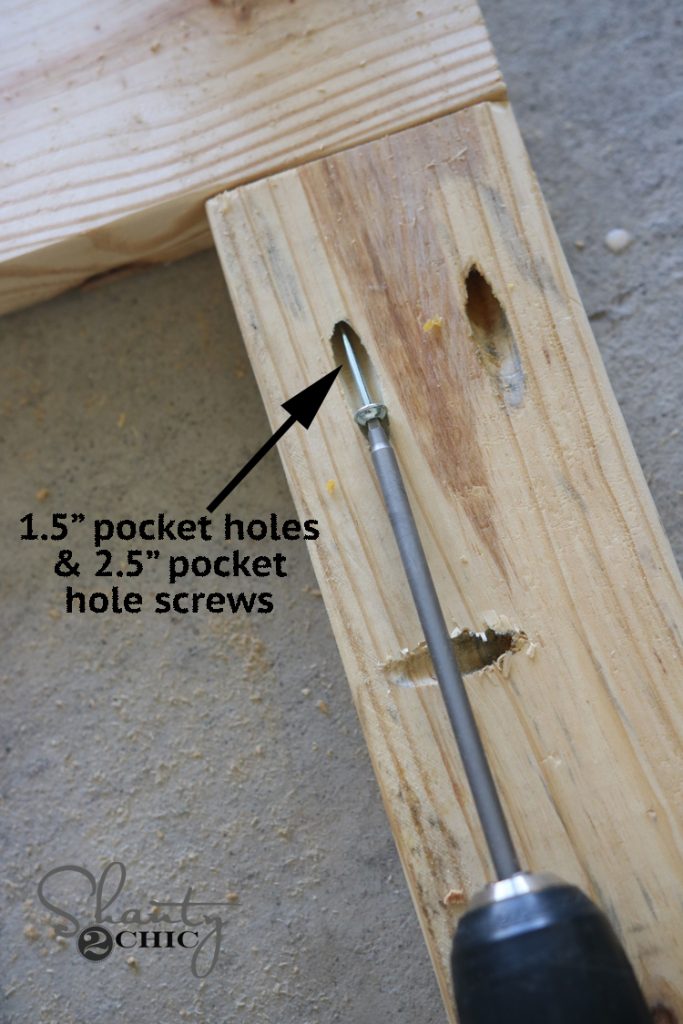
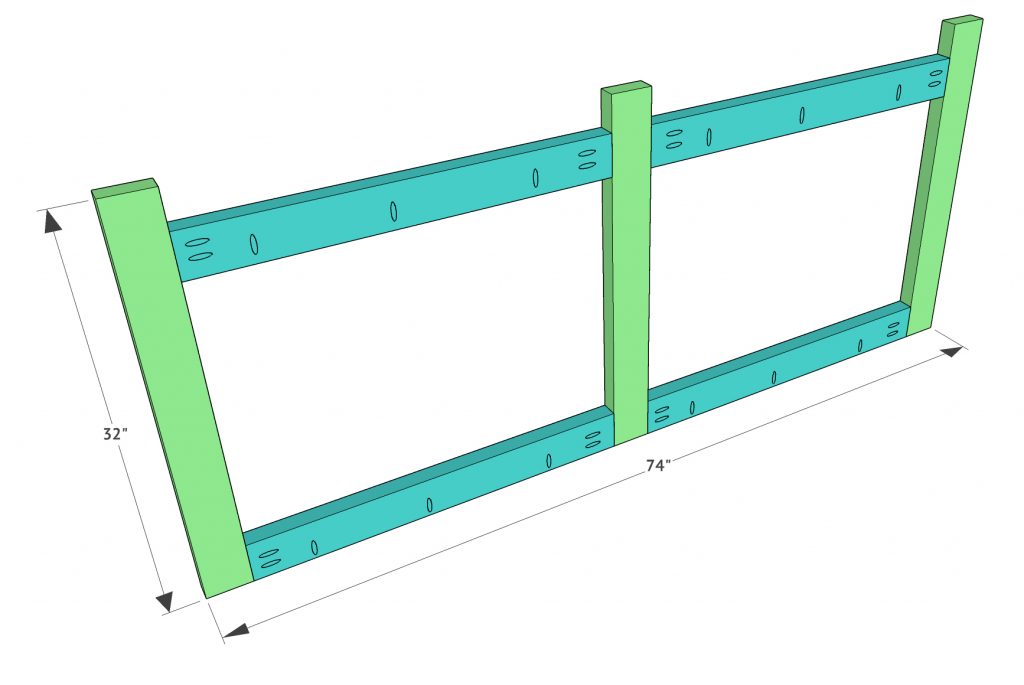
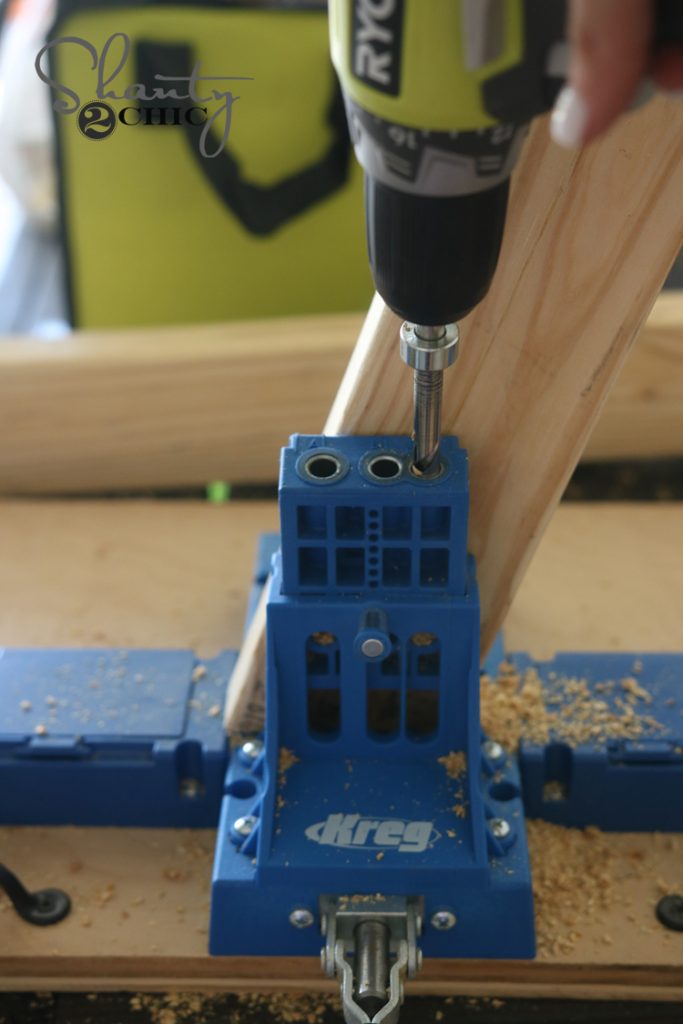
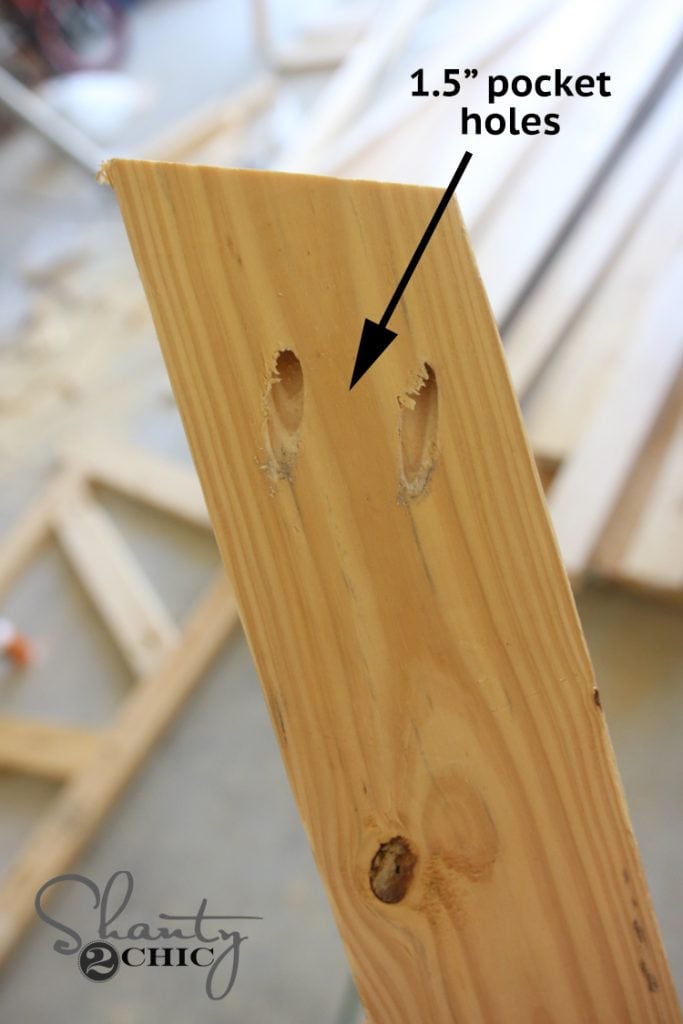
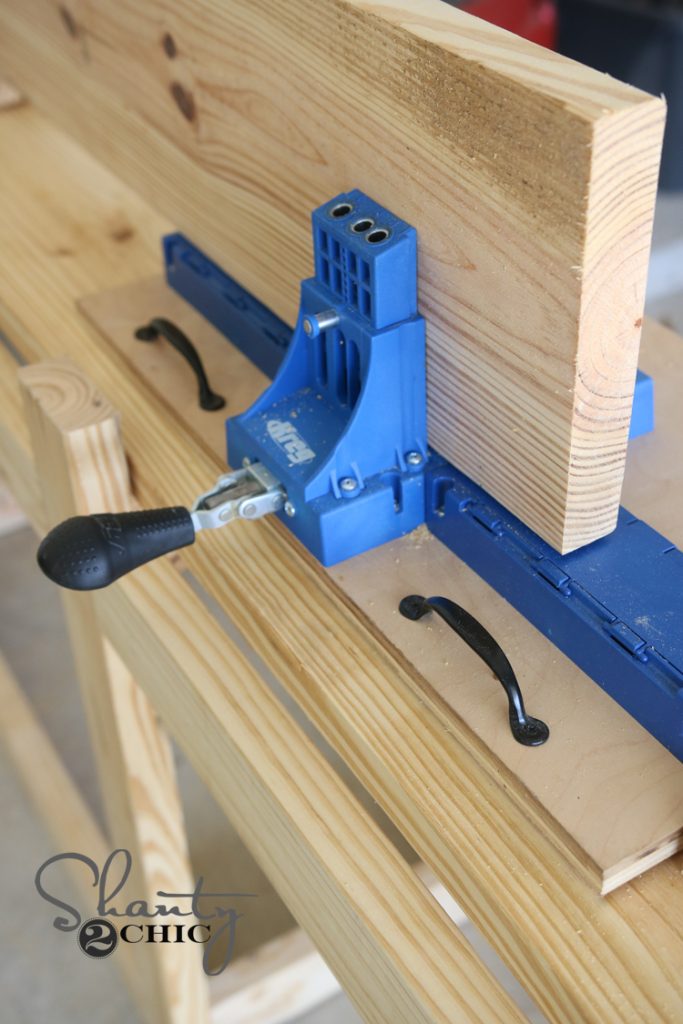
My first step was building the back of the console. This begins with a frame. This entire piece is built using my K5 Kreg Jig which made the road trip with us You will make 1.5″ pocket holes where I have marked in the cut list. I started by making those pocket holes for the boards that create the frame of the back of the console. You will create two of these frames…. One will be the back with the diagonal accents and the other will remain as is for the front of the table.


kreg-jig-to-build-table

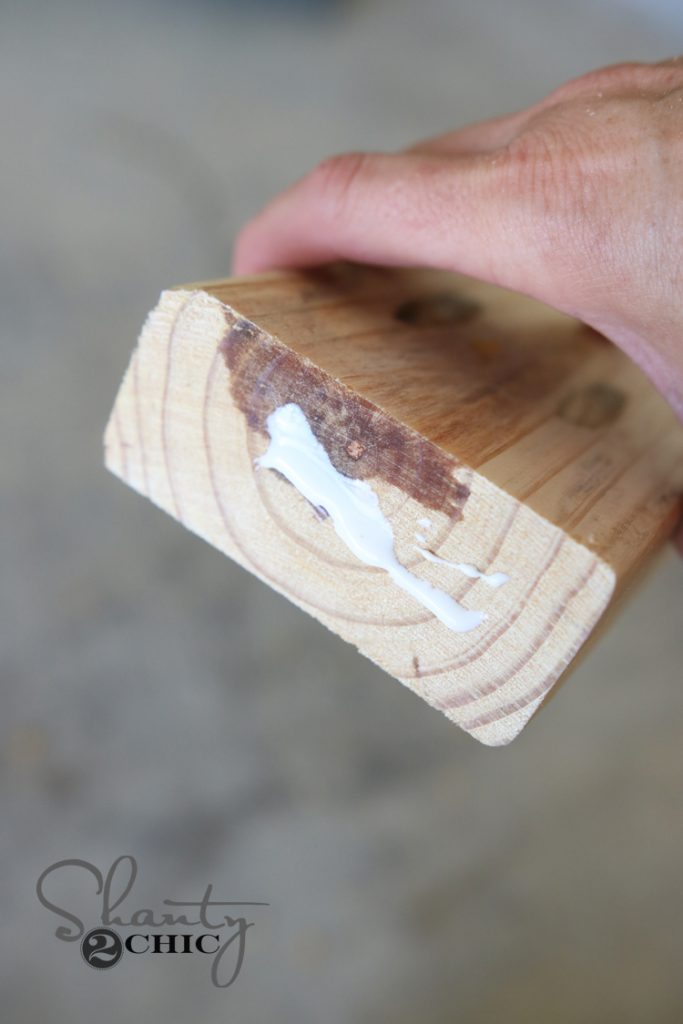
I used wood glue between each joint…


wood-glue
And, I used 2.5″ pocket hole screws through each of my pocket holes.

attaching-sides
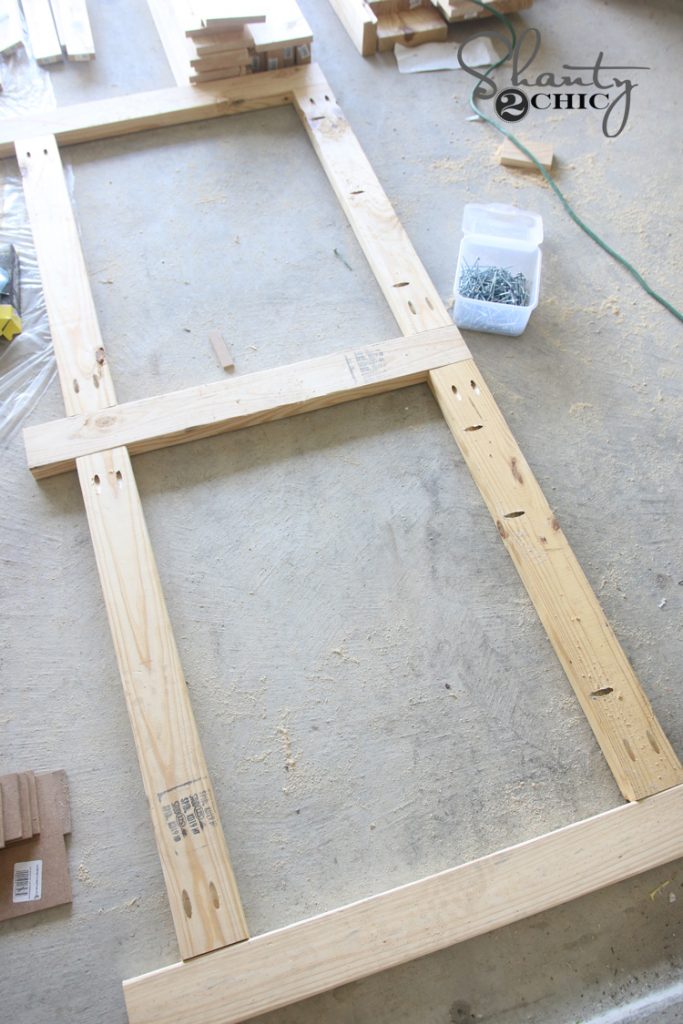
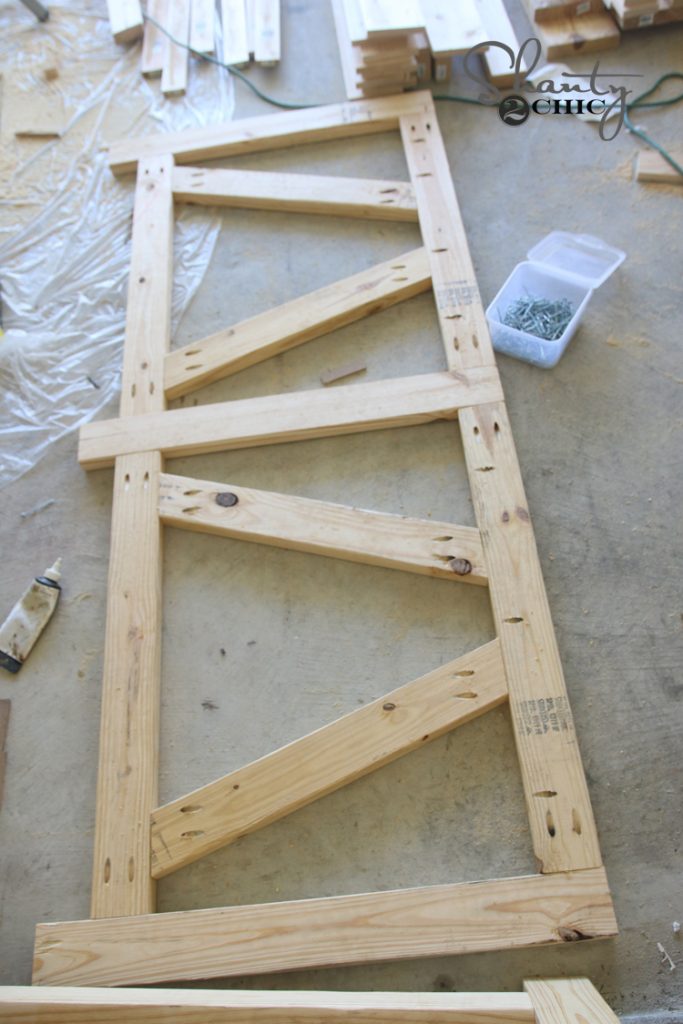
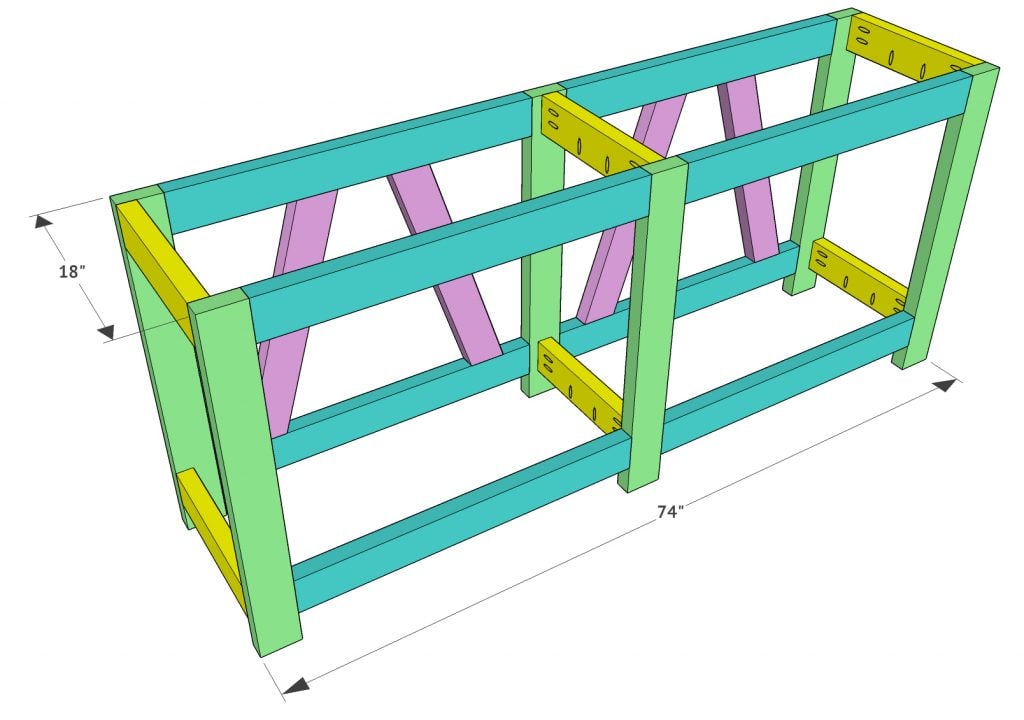
You should at this point have 2 frames that look a bit like this…

table-brace

building-frame-for-the-back-of-the-table
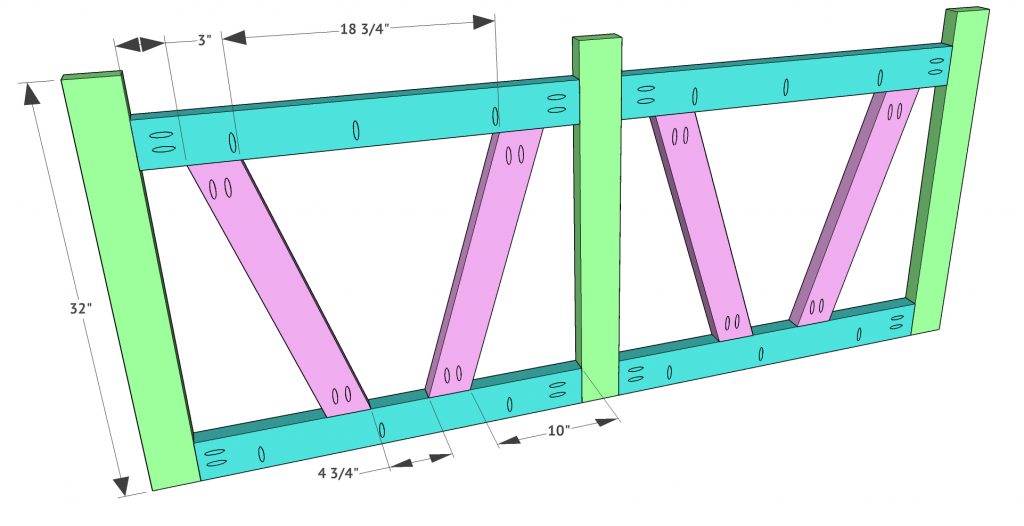
Now, I added the diagonal accents to the back frame. You want all your pocket holes facing the same way so that they remain hidden in the back when it’s all assembled.

After making the angled cuts on the diagonal pieces, you will put them in the Kreg Jig like this to make the 1.5″ pocket holes.


creating-the-pocket-holes-for-the-diagonals
They will look like this once the pocket holes are made.

pocket-holes-for-diagonals
I attached each piece to the back frame using wood glue and 2.5″ pocket hole screws.

Here is a shot of the spacing…


back-of-console

building-back-of-console-table
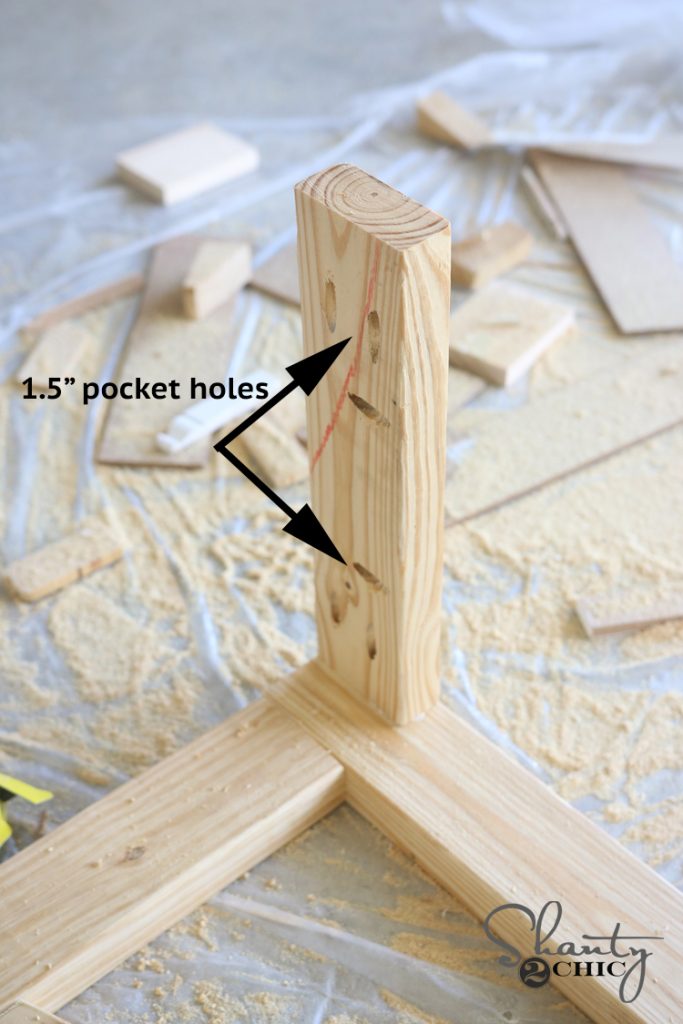
Next, I added my side pieces. These are also attached the same way with glue and PH screws.

small-sides-of-console-table
The bottom sides will look the same, and here is a shot of the spacing of these supports.

small-aprons
At this point, I attached the front base to the back base using 2.5″ pocket hole screws through the pocket holes in the short supports and into the back of the front frame.

base-console
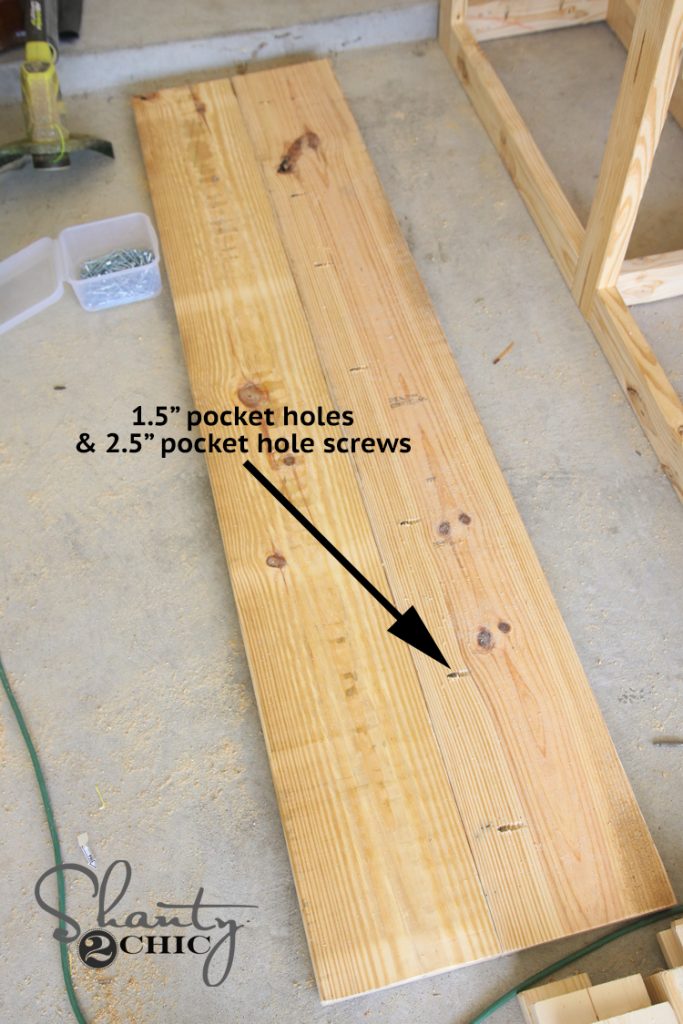
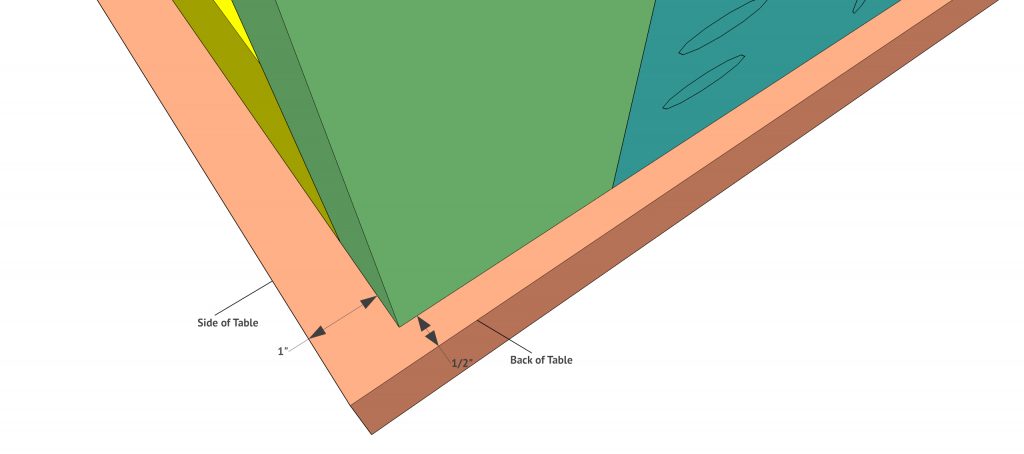
Final step is creating and attaching both shelves. These look the same but the top uses a wider board. I added pocket holes to both piece of each shelf first.

create-pocket-holes-for-table
Next, I attached them together using 2.5″ pocket hole screws.

top-of-console-table
To attach the top shelf, I laid the entire base upside-down on the bottom of the top shelf and attached with 2.5″ pocket hole screws through the pocket holes I added on the aprons.

You can see spacing of this step here…


where-to-line-up
I attached the bottom shelf the same way, but laid the console on it’s side to do so, making it easier to access the pocket holes on the bottom supports.

attach-bottom-shelf-boards
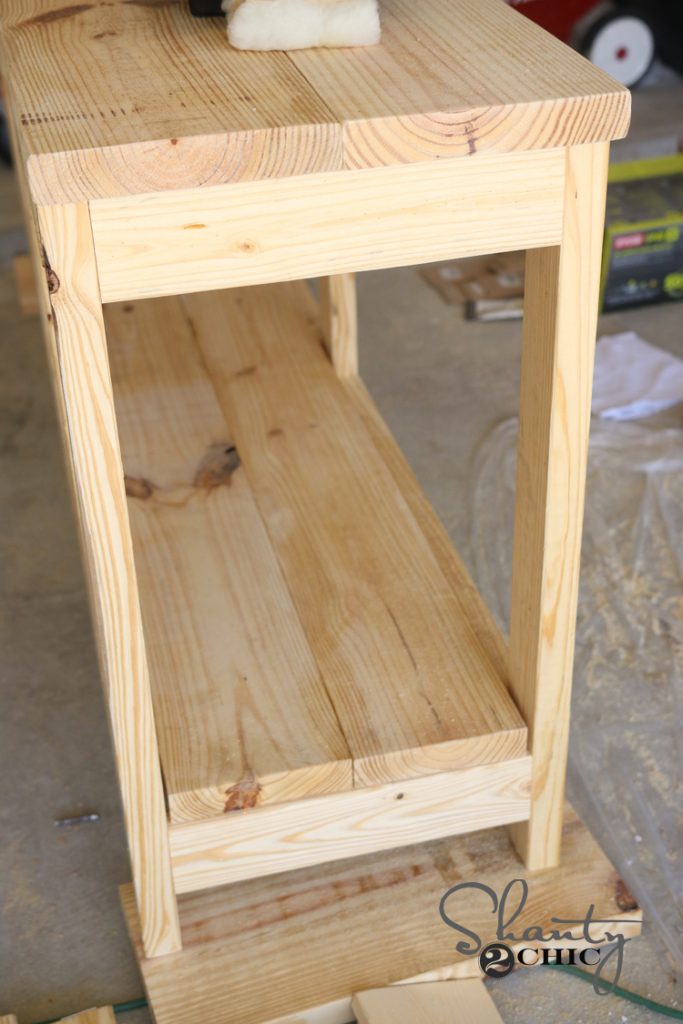
Here is a shot of it all finished up and ready for stain!

side-of-console

We originally planned on using Briarsmoke for this table, but I left it in Ft. Worth… Oops! Apparently, it’s difficult to find Varathane stain in Houston! So, we mixed Weathered Grey and Dark Walnut to get this finish… Which is just about the same! Here are a few more shots of her all finished up!


diy-diagonal-base-console-table-by-shanty2chic

diagonal-base-console-table-by-shanty2chic

diy-diagonal-base-console-table-free-plans

diagonal-base-console-table-free-plans-by-shanty2chic
You can find ALL the cute baskets and accessories at At Home!

Thanks so much for stopping by guys! Let me know if you have any questions at all!


~Whitney


Original article and pictures take www.shanty-2-chic.com site

четверг, 22 октября 2009 г.

DIY Cutting Board Holder for a Cabinet Door

DIY Cutting Board Holder for a Cabinet Door

Are you looking for a place to put your cutting boards? I have been storing mine on my counter tops, but I have been wanting to de-clutter the look in my kitchen lately, so I came up with this nifty idea for a DIY Cutting Board Holder that fits neatly behind my cabinet door.


This DIY Cutting Board Holder for a Cabinet Door is simple to do and keeps baking racks and cutting boards out of site but easily accessible.

My husband and I are in the process of redoing our kitchen. I have a tiny gallery kitchen and every inch of space in it is important. We just finished making over my kitchen pantry, and changed it from an overstuffed closet to a wonderful walk in pantry. You can read about how we did this here.


Counter space in my kitchen is at a real premium. There are certain appliances that I use all the time and I need to have them out. But having just a few feet of counter space means that anything that takes up room that doesn’t need to means that I have less room to actually use the space. So, even though I use my cutting boards daily, I still wanted them out of the way. As an added plus, once we install a new back splash, we will be able to enjoy the way it looks instead of having it hidden behind plain cutting boards!


My cutting boards used to be stored on the counter tops

As I was pondering my lack of space, the idea of using the back of a cabinet door came to mind, so Richard and I started measuring and cutting and came up with a great little DIY Cutting Board Holder that keeps them very handy, but also gives me back a bit of my much needed counter space.


It’s time to make this DIY Cutting Board Holder.


This tutorial contains affiliate links for your crafting convenience. To make this holder, you will need the following supplies:


We had a lot of wood left over from the shelving that we used for the pantry make over, so it was just a question of deciding how large we wanted the holder to be and cutting the wood in those sizes. For my unit the sizes for the pieces of wood were these:


  • 2 pieces of 9 1/2″ x 2 1/2″ x 5/8″ for the side edges
  • 1 piece of 14 1/4″ x 2 1/2″ x 5/8″ for the bottom edge
  • 2 pieces of 14 1/4″ x 5/8″ x 5/8″ for the front holding strips

Cutting the side pieces and front sections from left over wood was the first step

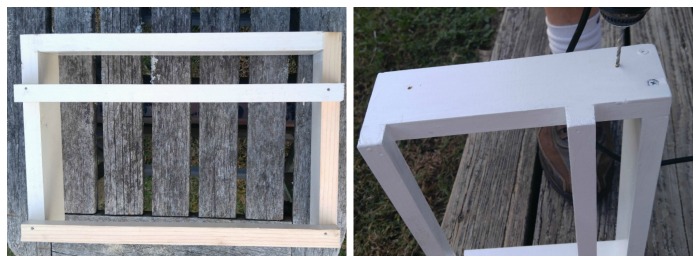
Next we drilled holes for the screws and attached the side pieces to the bottom edge.


Screws hold the side pieces to the bottom of the holder

The front pieces got attached to the cutting board holder frame with some small nails. A quick measure with a carpenter’s square showed us whether it needed adjusting so that it would sit well on the cabinet door.


We attached the front braces and checked to see how square the holder was.

Next came a bit of sanding with some sand paper to give the edges a smooth finish and another quick measure with a small spirit level.


The unit needed to be sanded and then measured to see if it was level

It’s almost done! The DIY Cutting Board Holder got a few coats of white paint to match the inside of my cabinet doors. Then we drilled some holes for the brackets that will attach the unit to the cabinet door. At this point, we also removed the cabinet door to make mounting the unit easier.


Front sections will hold the cutting boards in place and all that is needed is a fresh coat of paint

We used Stanley 1″ x 3/4″ chair braces to attach the DIY Cutting Board Holder to the cabinet door. They had a smooth, rounded look to the and seemed less industrial looking than normal L shaped brackets. Since we had the holes drilled for the screws, it was easy to do. First we attached the braces to the cabinet door, and then to the unit itself.


Chair braces were used to attach the holder to the cabinet door.

Ta da!! The DIY Cutting Board Holder is attached. But then I thought “It’s very functional, but not too pretty. What can I do to jazz it up a bit?


The cutting board holder is attached to the cabinet door

I thought of a few things. At first, I was going to get out some stencils and just hand paint a design on the sides of the DIY Cutting Board Holder. But then I found some adorable dimensional stickers at Michael’s craft store. Amazon also has some similar dimensional stickers here. They were perfect! My set had a Kitchen Aid mixer, some cookies, an apron, a rolling pin and lots of other kitchen designs. How adorable they are and just perfect for my project! This made finishing off the project so much easier and faster than hand painting. Don’t you think?


Dimensional stickers will decorate the sides of the cutting board holder and add some jazz to it.

I played around with the stickers a bit to decide just where to put them and came up with my design. Since these stickers are meant for scrapbook projects and I thought they might not stick well to this painted surface, I decided to use a hot glue gun to attach them to my DIY Cutting Board Holder.


The dimensional stickers adds a nice touch to the cutting board holder

I cut some of the stickers into two and ended up with enough to cover the visible side of the DIY Cutting Board Holder as well as the two front braces. I didn’t worry about the right side, since it will not show when the door is opened to get the cutting boards.


DIY Cutting Board Holder for a Cabinet Door

Here is the holder attached to the cabinet doors. It holds my cutting boards and wire baking racks in place, gives me a bit of much needed counter space and looks cute as can be. I am delighted with the way it came out.


DIY Cutting Board Holder for a Cabinet Door
Would you like some more DIY inspiration? Please visit my

Home Decor DIY board on Pinterest.


Where do you store your cutting boards? I’d love to hear about your ideas in the comments below.


Disclosure of Material Connection: Some of the links in the post above are "affiliate links." This means if you click on the link and purchase the item, I will receive a small commission from the sale, but the price is the same for you. I am disclosing this in accordance with the Federal Trade Commission's 16 CFR, Part 255: "Guides Concerning the Use of Endorsements and Testimonials in Advertising."


Original article and pictures take thegardeningcook.com site