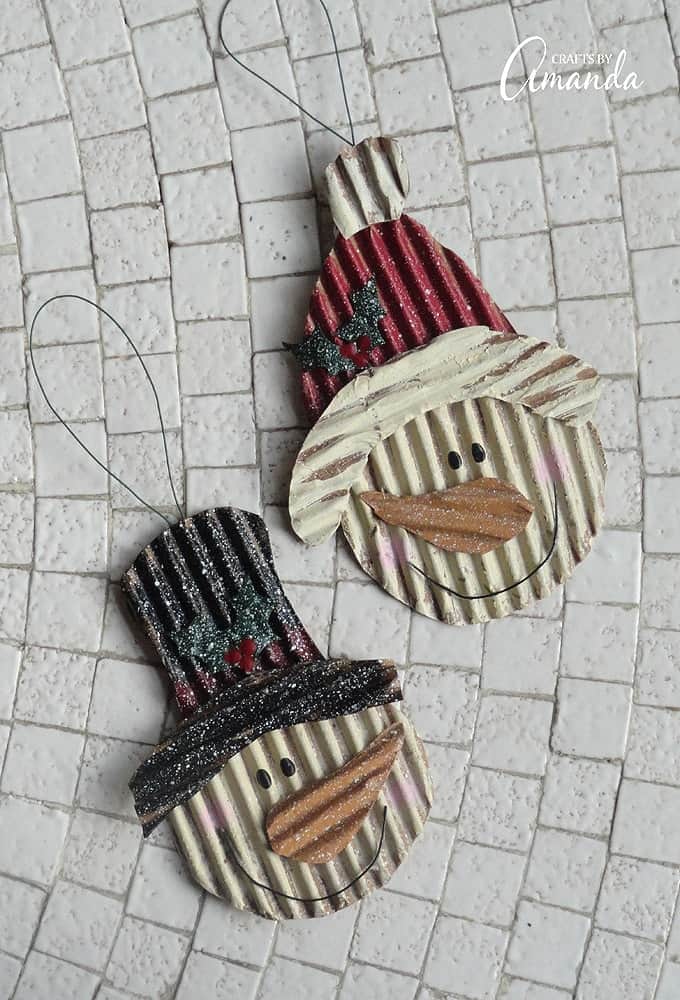
I adore snowmen, and every year I try to make at least one new snowman ornament. Several years ago I made these corrugated cardboard snowman ornaments. They have turned out to be one of my most popular snowman ornaments and are among my favorites on the tree every year!

I was inspired by a dollar store ornament that caught my eye on a blog post.
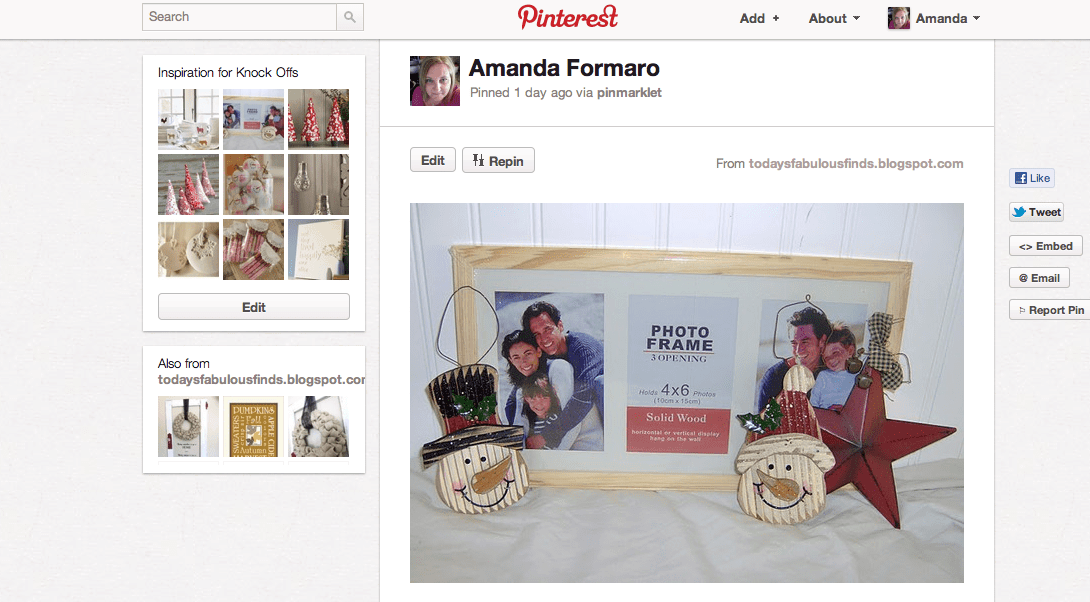
I had pinned this to my “Inspiration for Knock Offs” board. The post is from Today’s Fabulous Finds and it’s a tutorial for her adorable “Frame for Every Season“, so be sure to check that out! That’s when I saw the cute ornaments she bought at the dollar store. I’m not sure what they are made of, but I’m guessing like a tin material? At any rate, as soon as I saw them I knew I could make them using corrugated cardboard.
Corrugated Cardboard Snowman Ornaments
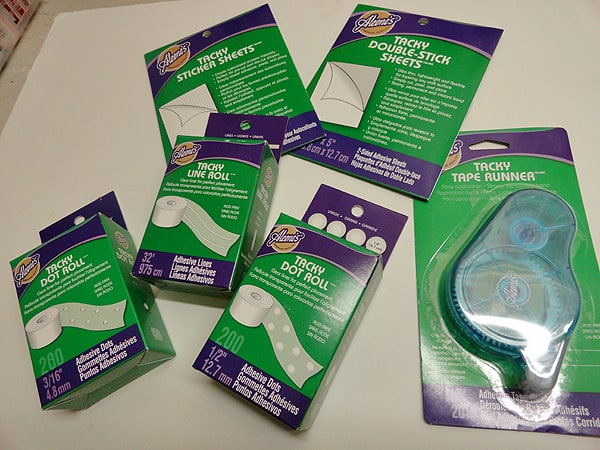
I could have used hot glue to make these, but I had a box of Aleene’s Dry Adhesives to play with so figured I would try those out. If you’ve been to Michael’s lately you’ve probably seen these. I knew that the Tacky Dot Rolls would be perfect for this! I was a little unsure as to how well they would hold the cardboard together considering it’s wavy texture, but they worked beautifully and I’ve been hanging them on my tree since 2011! So much easier than glue, and no mess. Totally love that!
NOTE: I made these in 2011. This update was added in 2017 and I still hang these ornaments on my tree every year! Never had a problem with the adhesives coming off.
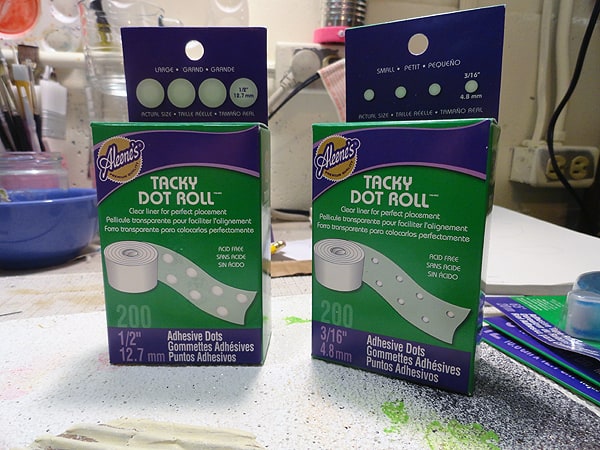
I used the large dots and the small dots. This worked perfectly because there were some tiny areas (tip of the snowman’s nose for example) that the large dots were just too big for, but the small dots were ideal. I’ll show you exactly how I put this together, ready?
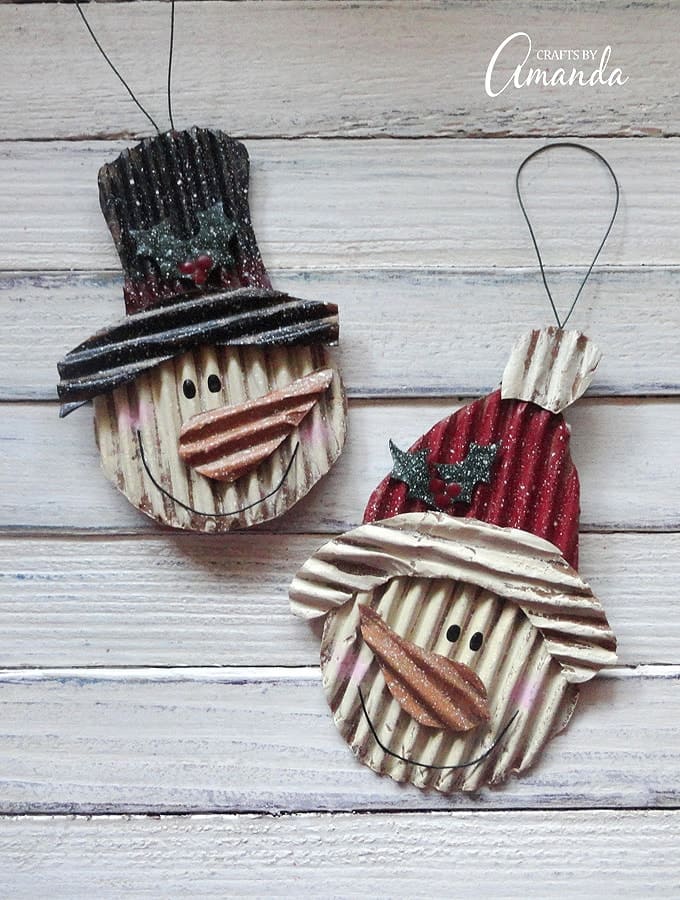
Making cardboard snowman ornaments
I tried to match the paint colors to the photo as best I could. I used Americana Acrylics in the following colors:
- Sand (snowman faces)
- Honey Brown (noses)
- Deep Burgundy (Santa hat, black hat band, holly berries)
- Hauser Dark Green (holly leaves)
- Baby Pink (cheeks)
- Lamp Black (Top hat, eyes, mouths)
- Sand + White (Santa cap’s pom pom and brim)
- White (splatter)
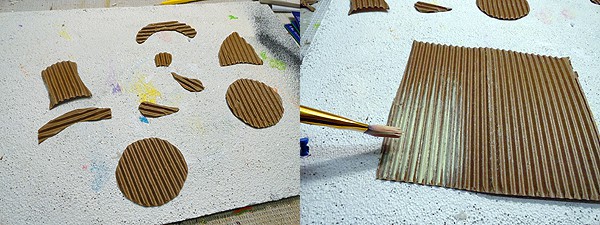
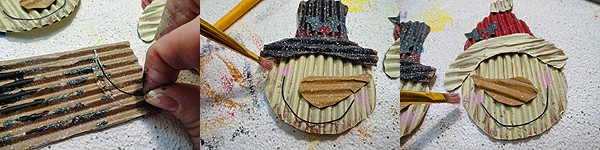
First I drew the shapes for the ornaments, using the photo as a guide. I’ve created a pattern for you if you’d like to try these too. I had just received a book in the mail and it came in this corrugated cardboard mailer. Nice! After cutting out all the ornament shapes, I practiced painting on a scrap piece of the cardboard. I wanted the paint to look like aged wood, just like the ornaments I was drawing inspiration from. So I used some strokes with the brush loaded, and then I dried the brush on a dry cloth before lightly brushing the creases.
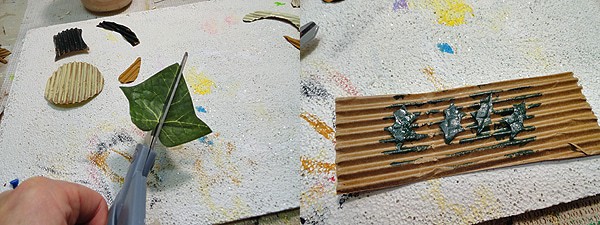
Once I was comfortable with the paint, I went ahead and painted all the pieces. While they were drying, I cut the holly leaves from an old silk plant I had laying around. You could use felt or fabric too. I placed the holly leaves on a scrap piece of cardboard and painted them green.

I almost forgot to add the hat band, so after the black hat dried I painted that on as well. After everything was painted it was time to splatter. If you’ve never splattered before, there’s nothing to it. Just thin some white paint with water, dip a toothbrush in it, dab off excess on a soft cloth, then drag your finger across the bristles. You should always do a practice run on something before hitting your actual project. I wasn’t sure what to use for the smiles, then I remember the floral wire I had on the shelf. I shaped them into two smiles and painted them black.
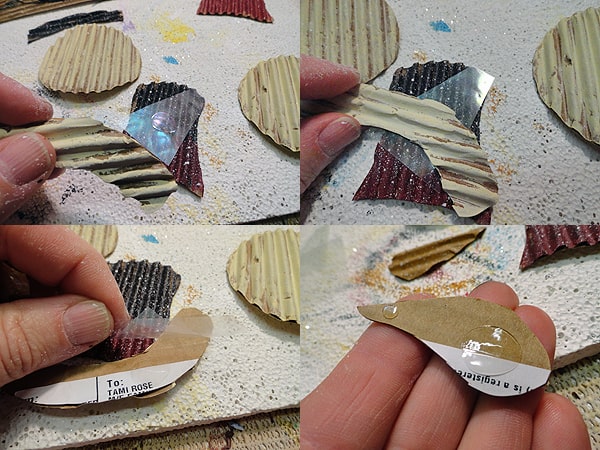
Now to put it all together! The dots come in a roll, so you just cut off a section with a dot so you can work with it by itself. Don’t touch the sticky dot, instead press the dot using the plastic backing, onto the surface where you want the dot to stay. Apply some pressure, then peel the plastic backing off and the dot will stay in place. Then you can press the item onto whatever you want it to adhere to. In the picture above, you can see that I used two different sizes on the nose.
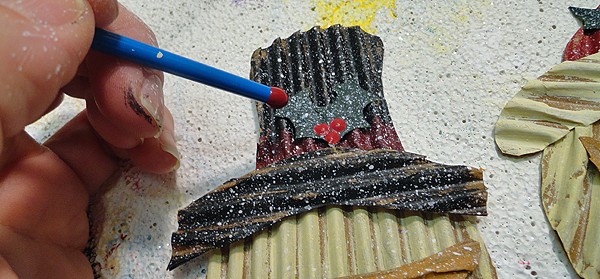
After you’d put everything together using the dots, add the final details. You can add the holly berries using the handle end of a paintbrush.
To add the smiles, squeeze some instant grab glue onto your scrap cardboard, then dip both ends of the smile into the glue. Then place it on the snowman’s face. Use a small scruffy paintbrush to dab on the pink cheeks. Use the handle end of the paintbrush dipped in black paint to dot on the eyes. The eyes didn’t come out round like I thought because of the ridge in the cardboard, but they’re still cute :)
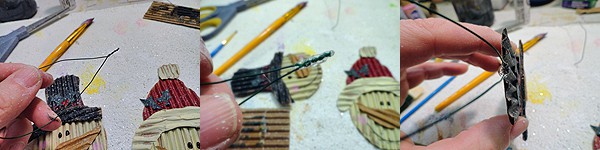
For the hangers, I used that same floral wire, but because of the shapes of the ornaments, I made two different types of hangers. The first one I just created a loop, twisting the ends and rolled that twisted end in instant grab glue. Then I inserted that into the cardboard at the top of the snowman’s black hat.
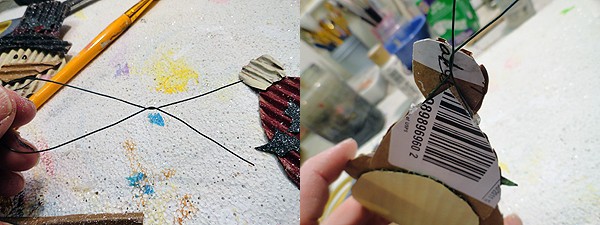
I didn’t want to put the hanger in the small pom pom of the red hat as I didn’t think there was enough stability. So for this hanger, I made a twist higher up so that I would have two ends to work with. After dipping those two ends in instant grab glue I inserted the ends into the cardboard on both sides of the top of the hat.
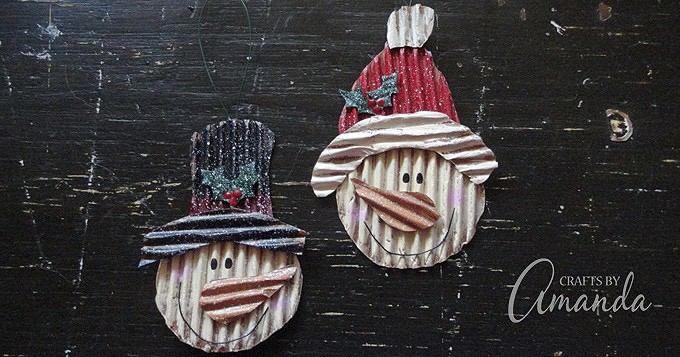
That’s it. All done! I am really pleased with the way that these dots from Aleene’s worked. I really wasn’t sure what kind of both they would have but I am really impressed. They are holding up really well and I didn’t have to wait for the glue to dry or clean up any hot glue strings. Awesome stuff. :)
If you liked this ornament idea, you might also like my Light Bulb Snowman Ornament this cute Jumbo Vintage Snowman Ornament or these super easy Wood Slice Ornaments using decoupage and festive paper napkins!
This post was originally published on this blog on Dec 8, 2011.
This is a CraftsbyAmanda.com sponsored post. I was compensated for my time and provided with free product with which to create. However, even though I was compensated, all opinions are truthful and 100% mine.
Original article and pictures take craftsbyamanda.com site
Комментариев нет:
Отправить комментарий