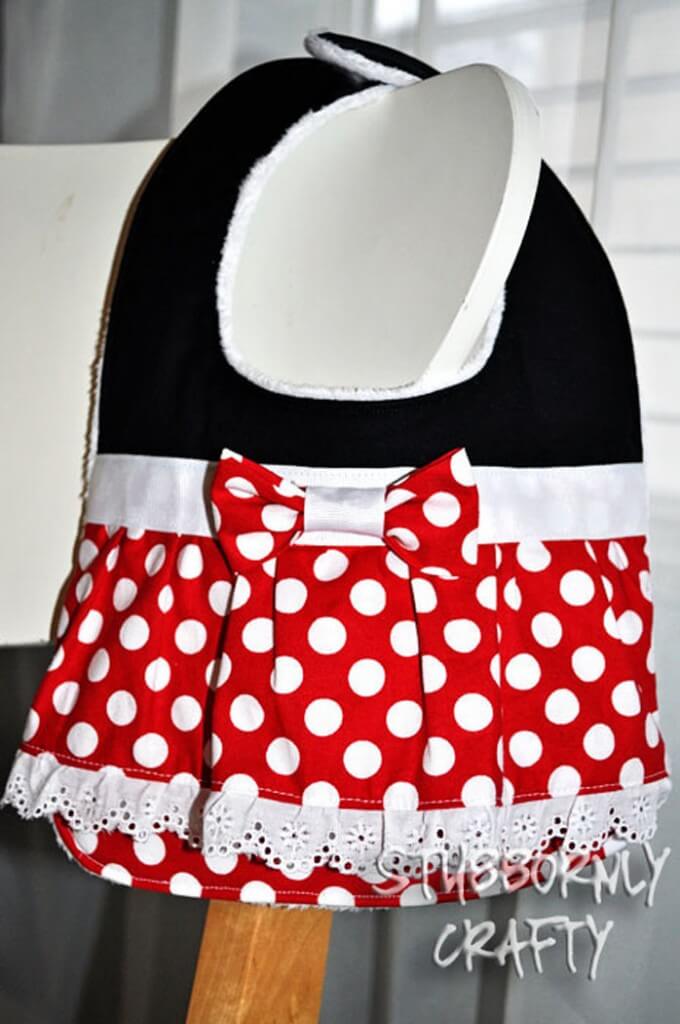
Hi all, I’m Lisa from Stubbornly Crafty. I’m pumped to be sharing a quick tutorial with you. I’m lovingly obsessed with all things crafty, and placing an emphasis on sewing this year. Sometimes you’ve just got to focus if you want to grow, right? I’m taking all sorts of sewing classes hoping to improve my skills and pass along some of the goodness in the process.
So here we go. Let’s get started. Today I am combining two of my favorite things — making baby bibs and Disneyland. I wish I was there right now. Supplies needed:
- Print out my Monster Bib Tutorial – GO HERE FOR PAGE 1 – GO HERE FOR PAGE 2. Read below before cutting it out.
- Fabric: black, white, and red/white polka dot for Minnie
- Batting (optional)
- Embellishments: 1 yard eyelet lace and 7/8″ white ribbon
- Fabric for backing (flannel, fleece, chenille, minky, etc…)
- Scissors
- Straight pins
- Thread
- Iron/Ironing board
- Sewing machine
- Snaps or velcro
Cut out just the two bib pattern pieces. Cut off at the dotted line on the bottom piece. We will not be taping them together like it states in the monster bib instructions. We’ll be using them as two separate pattern pieces. Discard the rest.
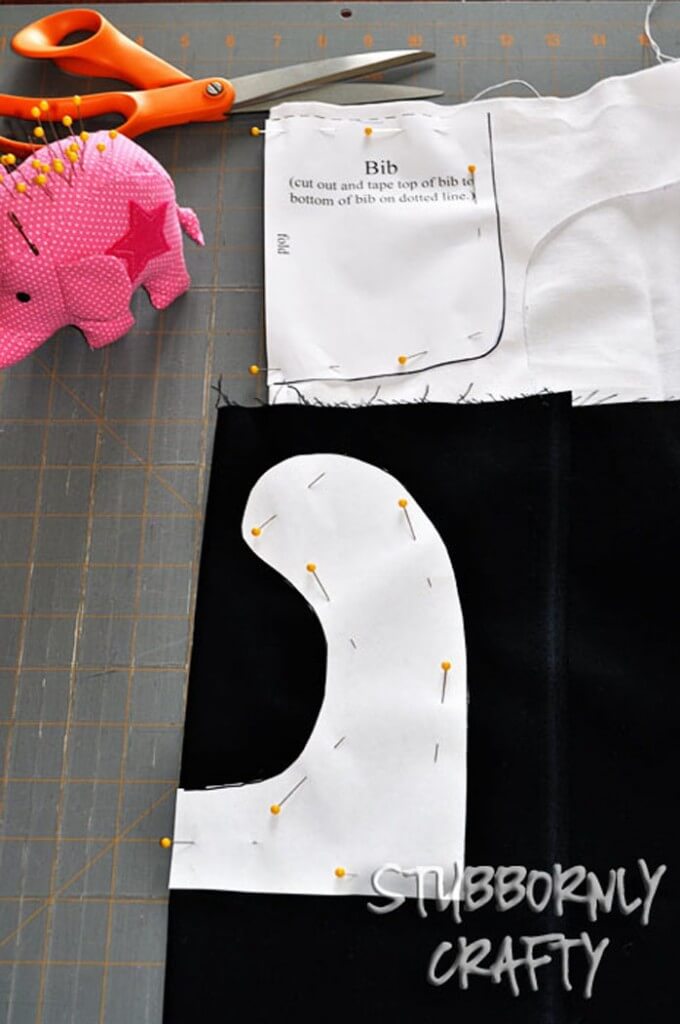
Iron your fabrics and then fold in half right sides together. Trace the pattern at the fold and cut out. For Minnie’s skirt, cut a strip from your polka dot fabric 5″ wide by the full length of your fabric. Cut off the selvage (finished edges with the wording printed on it). You’ll also need a rectangle 4″ x 7.5″ for the bow.
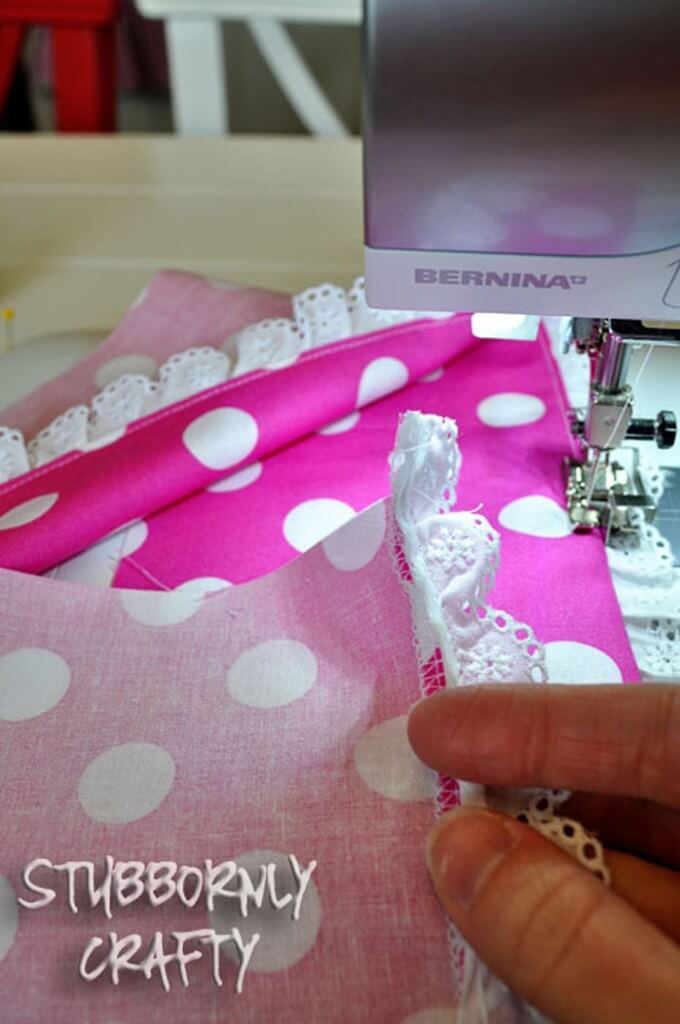
With your 5″ strip for the skirt, serge one side across the length or use pinking sheers. Then take your eyelet lace and match it up to the serged side right sides together. Sew together right above the stitch line. Iron flat and top stitch.
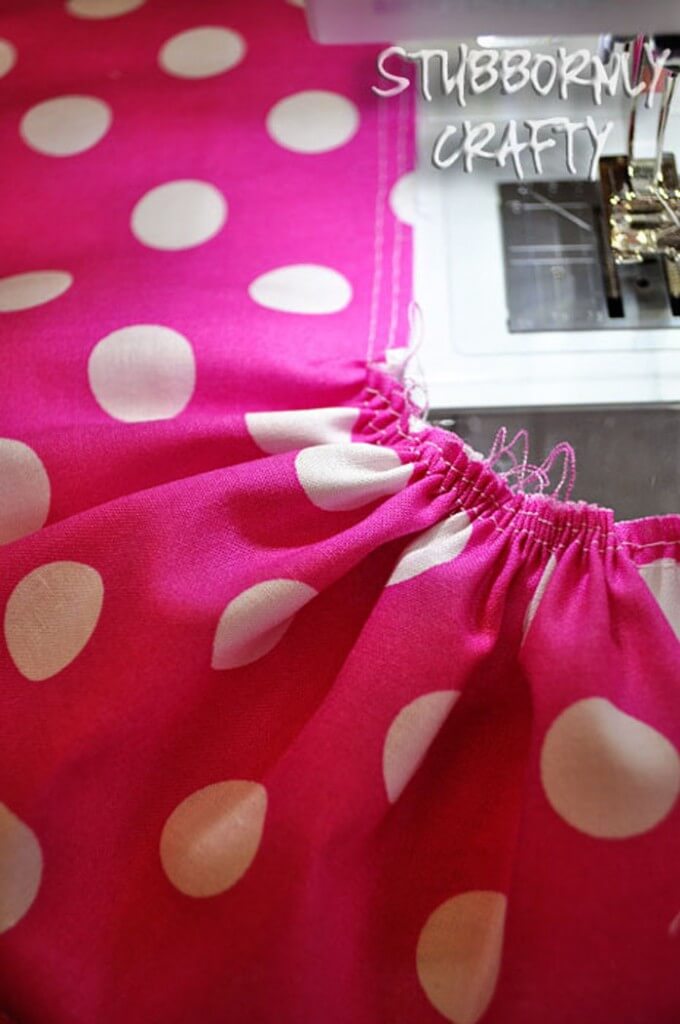
Let’s get that ruffle going! If you are using a ruffler foot, set it on 6 and go to town. If not, set your sewing machine on a straight stitch and jack your stitch length up as high as it will go. Sew a basting stitch on the opposite side of the eyelet lace on your strip of fabric from beginning to end. My sewing teacher recommends doing two basting stitches a 1/4″ apart. So like a good student, that is what I did. Pull your bobbin thread (bottom thread) to ruffle. Don’t make the ruffle too tight or it will be up in baby’s face. There will be excess. Possibly enough for a second bib depending on how loose you make your ruffle.
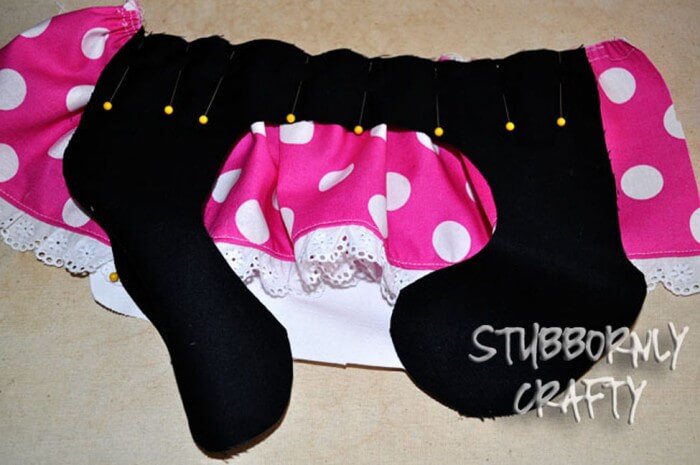
To assemble, lay your bib bottom (the white piece, a.k.a. Minnie’s bloomers) right-side-up and line your ruffle right-side-up with the top. Lastly, lay the top of your bib over the ruffle wrong-side-up with the neck hole facing down, as pictured above. Pin leaving some of your ruffle sticking out at both ends. Sew together using a 5/8″ seam allowance.
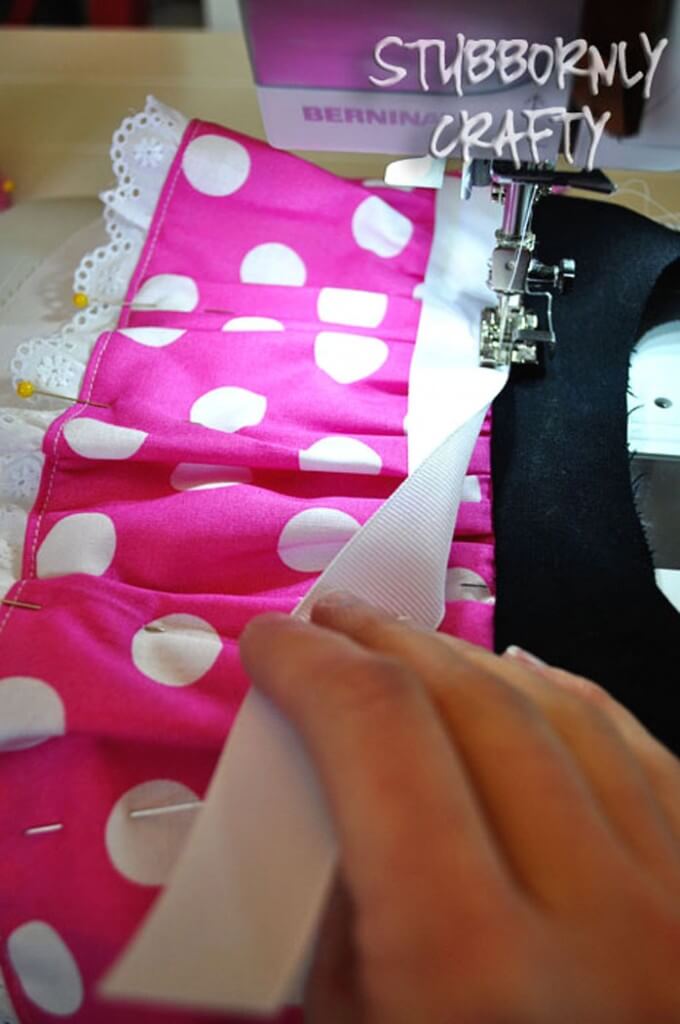
Iron the bib front flat. Pin the skirt down to the bloomers so that it lays how you like it. Cut a piece of your ribbon a little longer than the width of your bib for the sash. Sew the ribbon on to the bib front, lining it up just barely covering the black on top.
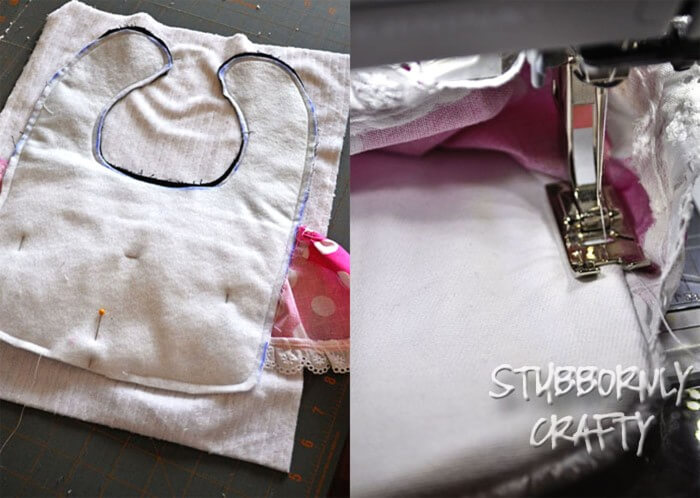
Cut your backing 12″x 15″. Place your bib front and backing right sides together. If using batting lay it on top of your bib front. Pin together. Stitch around the perimeter, leaving a two- to three-inch opening at the bottom for turning. Cut the excess backing off. Cut notches around the neck to help it lay flat. Turn right side out and iron. Top stitch the top section in black. To top stitch the bottom section, lift up the skirt and begin stitching about 2 inches above the bottom corner of the bib. Sew all the around the bottom edge, making sure to sew the opening (where we turned the bib right-side-out) closed. Finish that stitch at the same height that you began on the other side.
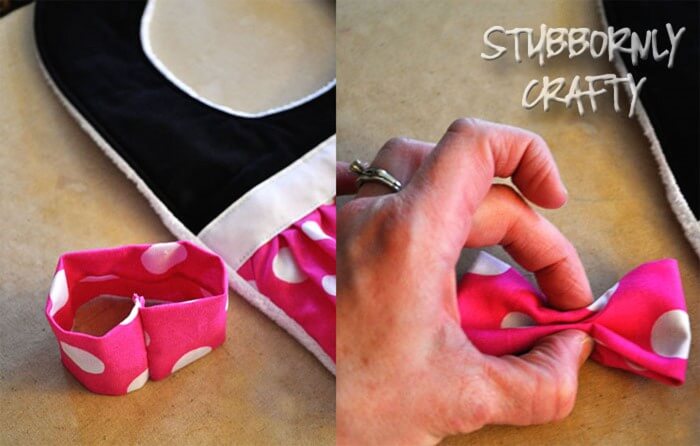
For the bow, fold your 4″ x 7.5″ piece of fabric in half long ways, right sides together. Sew a 1/4″ seam and then turn right-side-out. Sew the unfinished edges together making a ring. Flatten the ring and pinch it in the middle to make a bow. Tie a piece of ribbon around the middle. Sew it on to your bib.

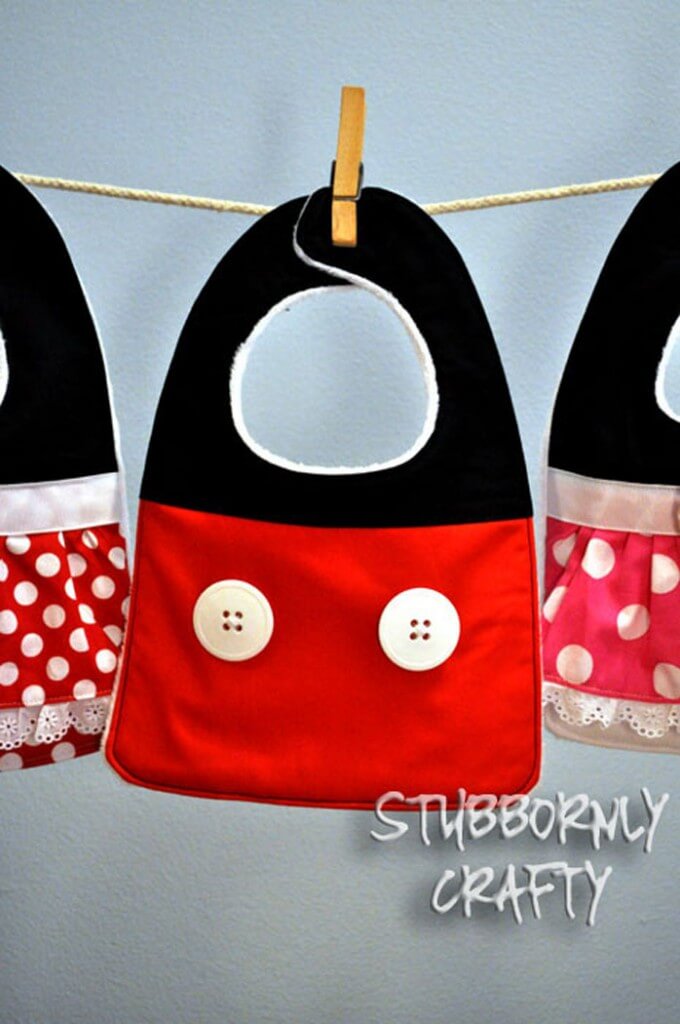
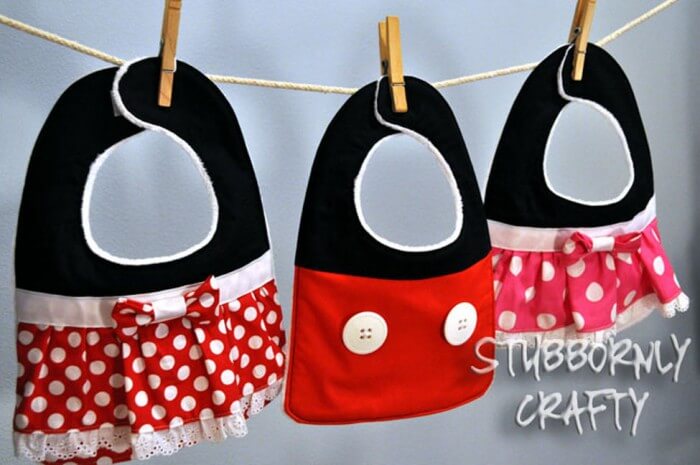
Hope you dig my fun little bibs. Thanks to Kristyn for letting me come play! Drop by my blog Stubbornly Crafty anytime for more fun or drop me a line on my Facebook page.

fold
te et h
Bib (cut out and tape top of bib to bottom of bib on dotted line.)
Original article and pictures take lilluna.com site
Комментариев нет:
Отправить комментарий