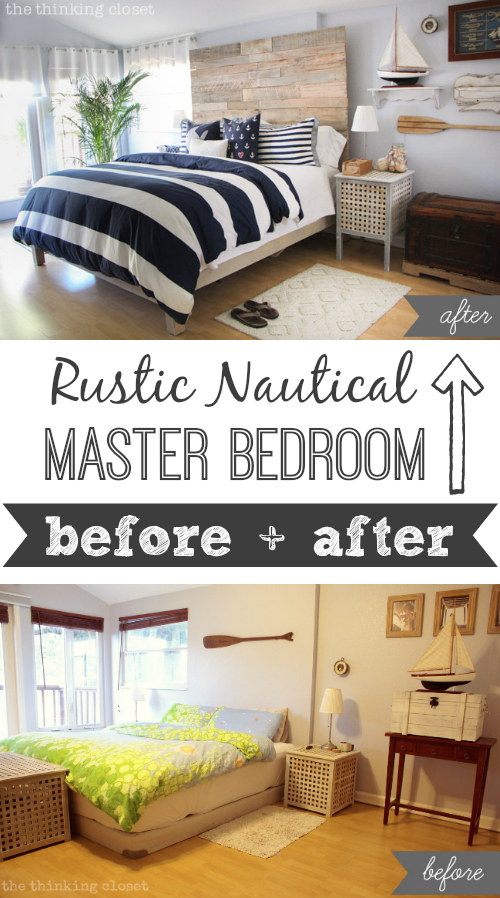
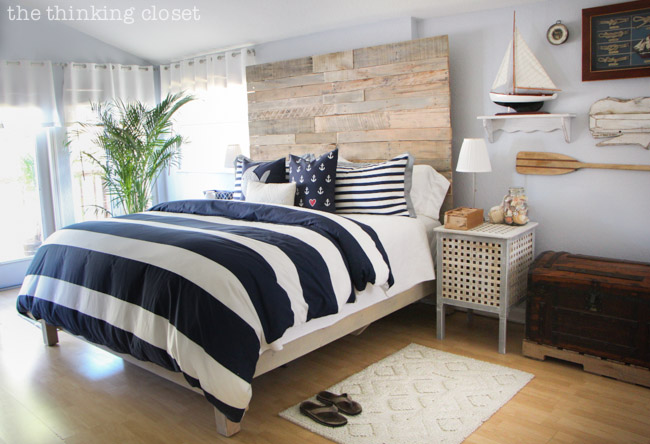
So, first of all, let’s just pause for a moment to talk about the fact that you all rocked my metaphorical socks off last week when we shared the Grand Reveal of our Rustic Nautical Master Bedroom Makeover. I guess I’ve been building it up for so long, I started to doubt myself in the final hour. I’ve never done a total room makeover before, let alone shared it with blogland. Before clicking publish, I wondered,
Will this even be worth all the hype? Or will everyone yawn and say, “Ho hum. That’s it?”
I braced myself for whatever responses would come our way; even if you asked for my resignation as DIY blogger. (Now, you see why I became a theatre teacher; melodrama runs through my veins.)
Then, you all had the nerve to blow my expectations out of the water with some of the most enthusiastic and supportive comments we have ever received…ever.
Okay, be honest, guys: did my Mom put you up to this? Or did you maybe drink a jug of Kindness Kool-Aid before reading that post? Because it was kind of unbelievable. And I’m so glad I don’t have to resign because I kinda sorta really love this whole blogging thing. Thanks, friends!
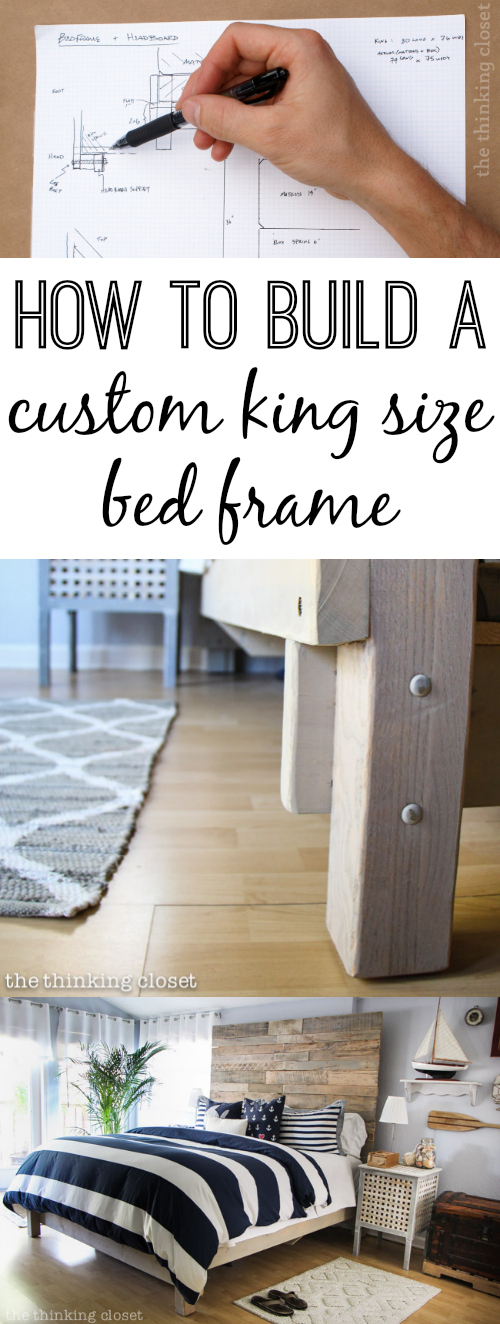
Alright now I’m going to actually hush up for once (what?!) and let my husband take over the rest of this blog post. Because when it comes to building a custom king size bed frame, well, he’s your man! He planned out the design, purchased the materials, and built that sucker all himself, so trust me, you want to hear it from him and not me.
And without any further ado, I give you my hubby, Mark, with the full run-down of How to Build a Custom King Size Bed Frame!
Mark’s Konstruction Korner
Mark here with a step-by-step of how we built our king size bed frame. It’s a simple design held together with bolts. I’ll take you through each phase, so you can tackle this on your own. Especially if you’re like me and you’d rather build it than buy it.
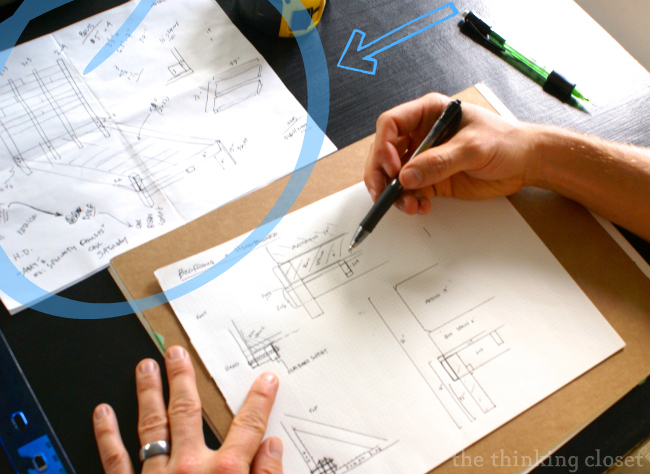
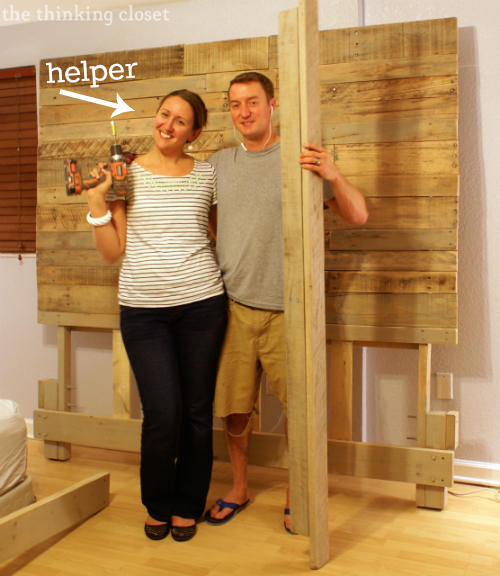
1. DESIGNING. First, draw out your plan. here are some pictures of ours:
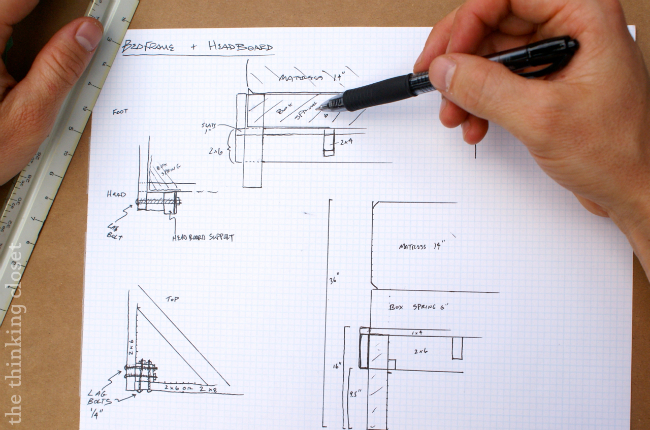
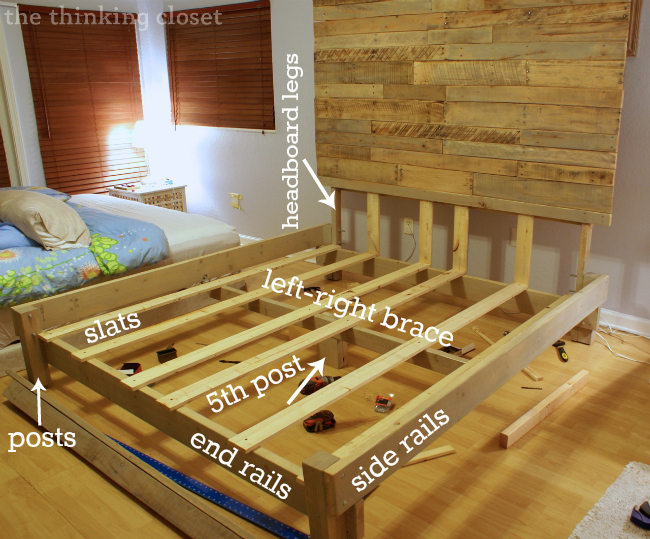
The basic design features side and end rails bolted onto the outside of 3″ vertical posts. The side rails will rest on the end rails where they overlap at the corners. Consider using bolts as your primary fastener, since they are hard to beat in terms of strength, and a large bed can be easily taken apart and put back together.
Our box spring and mattress are king size, so I made it a 5-post frame. The fifth post is in the middle and supports a left-right brace. Our box spring was only 6″ thick, so we designed the frame to “bury” or enclose the box spring.
As you draft up your plans, pay attention to the total height of the bed, considering the thickness of your box spring and mattress. A pretty standard total height is 30 inches, plus or minus a few.
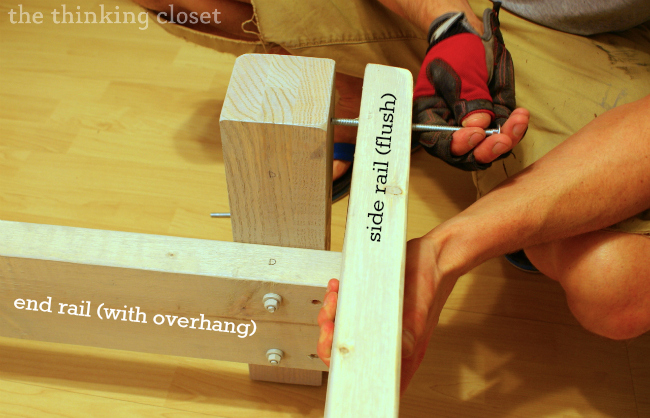
And here’s a photo with a key to help you keep track of the terms I’ll be using:
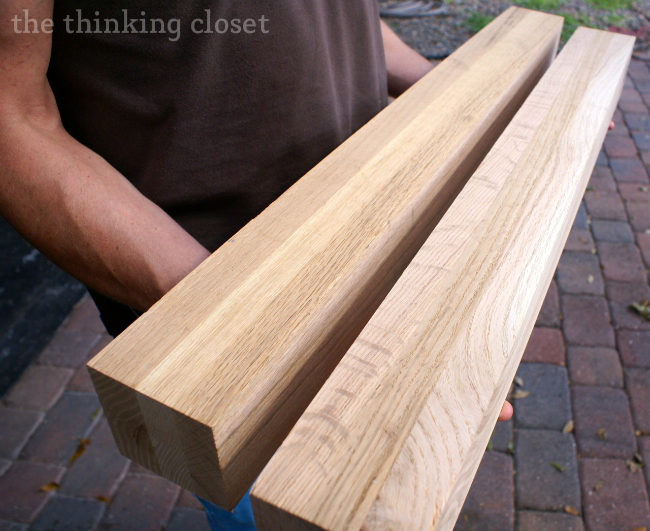
2. GATHERING. Find your materials. Although the headboard is made mostly from reclaimed pallet wood (click HERE for the full tutorial on that step), for the frame I went with white pine and oak from Home Depot.
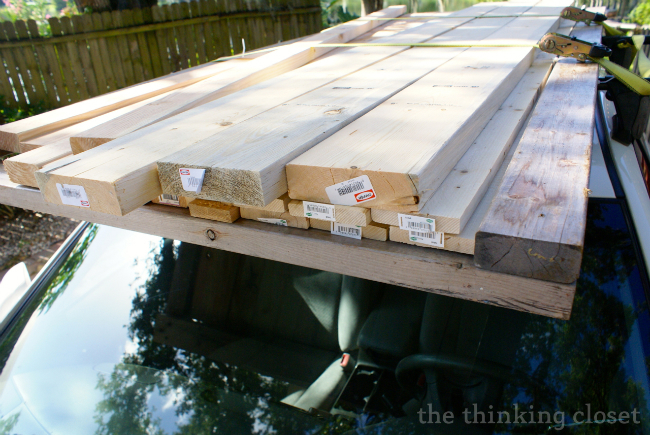
- (4) 3″x 3″ solid oak posts, each 15″ long.
- (4) 2″ x 6″ white pine (spf), 10′ long. Carefully select boards that are not warped.
- (8) 1″x 4″ slats
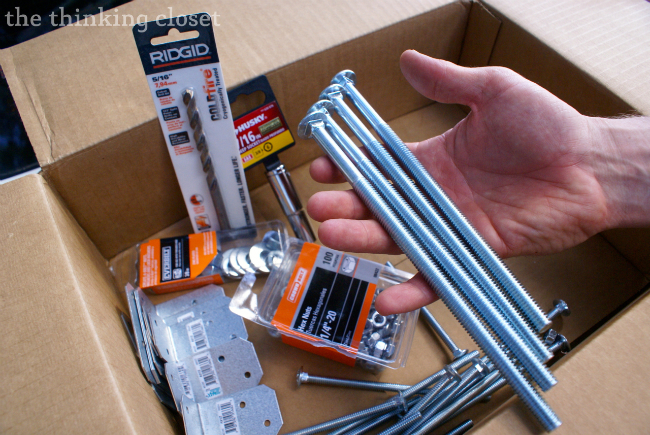
- (12) 1/4″ carriage bolts, each 5″ long
- (4) 3/8″ carriage bolts, each 6.5″ long for attaching frame to headboard uprights
- (1) package of nuts and washers for each size (3/8 and 1/4)
- (4) galvanized steel right angle braces, to attach the fifth post to left-right brace, and left-right brace to middle of side rails
- (4) non-skid black pads that you’ll add to the bottom of each of the 4 outside posts
- (1) 2×4 for left-right reinforcement across the middle. the post that supports this is made of (2) 2″ x 6″ pieces leftover from rails. It’s never a bad idea to have extra 2x4s, as you may need more or less bracing. Your call.
All of this rang up to about $150. Not bad!
3. CUTTING AND DRILLING. Remember to “measure twice, cut once.” This is a saying in carpentry that is so true. You probably will make a few wrong cuts or holes, just like I did, but if you measure and plan before firing up your tools, it will work out much better.
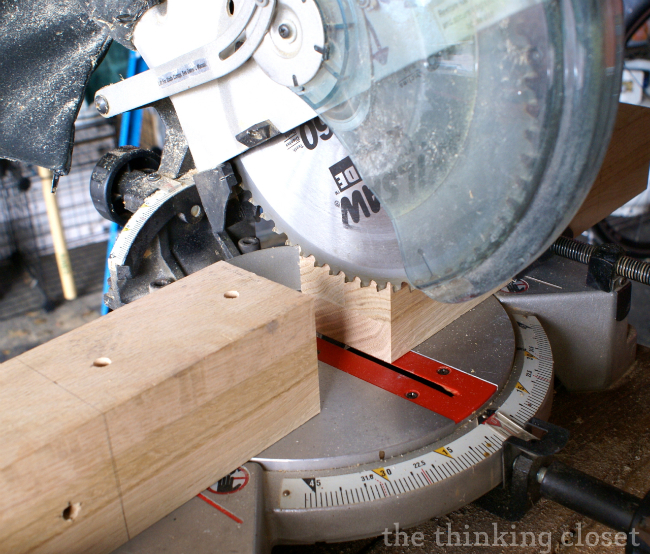
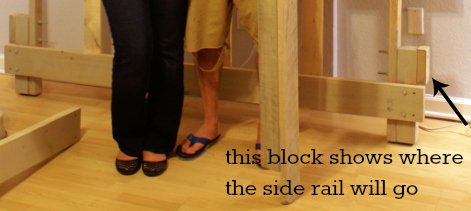
Cut the boards to the right length for the size of your bed. For the end rails, drill 2 holes roughly 3″ from each end, so that there will be just over 1.5″ of board hanging over. For the side rails, the holes can be 1.5″ from the end, since the side rails will rest on the end rail overhang. It’s much easier to show than tell…
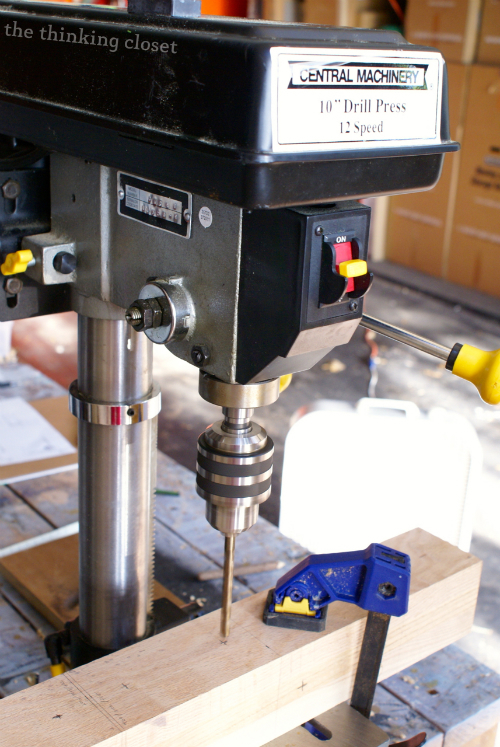
The ideal way to make the holes is with a drill press. However, a hand drill could be used instead, if you are just careful to drill at a 90 degree angle (it’s harder than it looks to do this in both planes). The angle and precise location of those holes will matter later when you place the bolts in step 4.

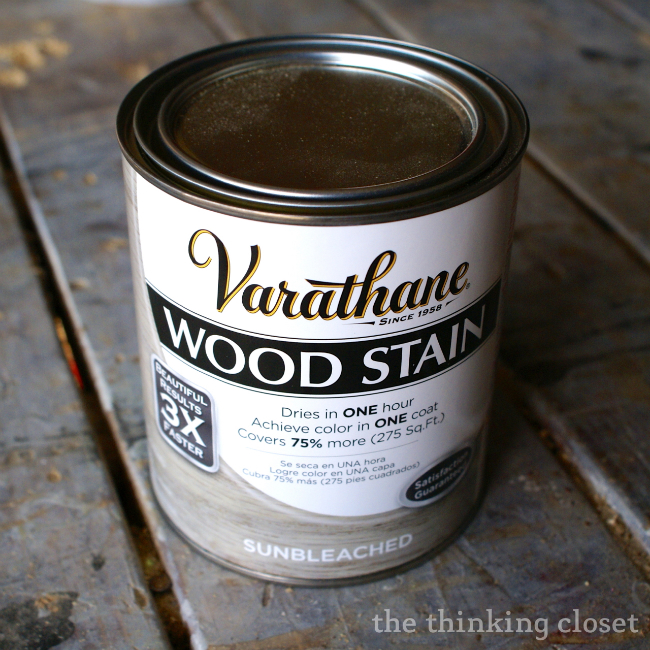
To get rid of splinters, you’ll want to sand everything, as well. We also stained our wood prior to assembly using Varathane “sunbleached” wood stain, which Lauren shared about in a separate video tutorial. Check it out here.
4. ASSEMBLE the structural pieces according to your plan. It is easy to lose track of which pieces go together when you try to reassemble inside the room. Once it is put together, label the insides of the boards at each corner (A,B,C,D).
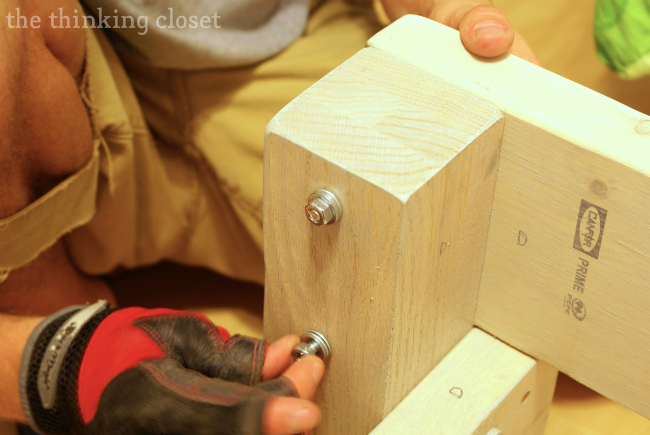

Be sure to note that the 4 larger bolts need to be at the head of the bed. They will be positioned parallel to the headboard and will go through the bed post, the side rail, and the headboard leg . For now, just put them through the bed posts and side rail, since we’ll add the headboard later.
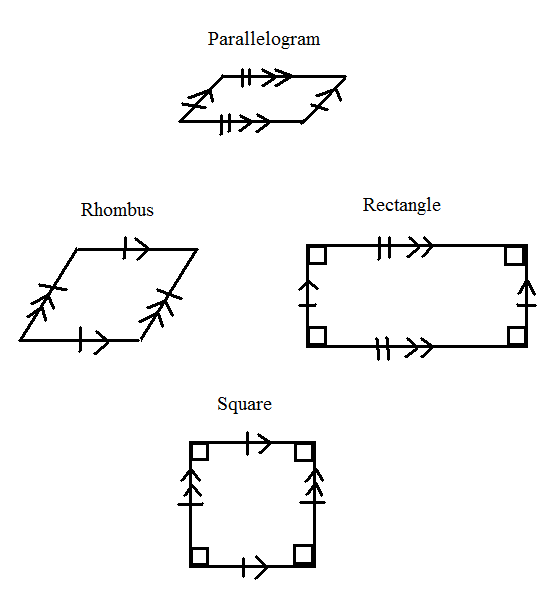
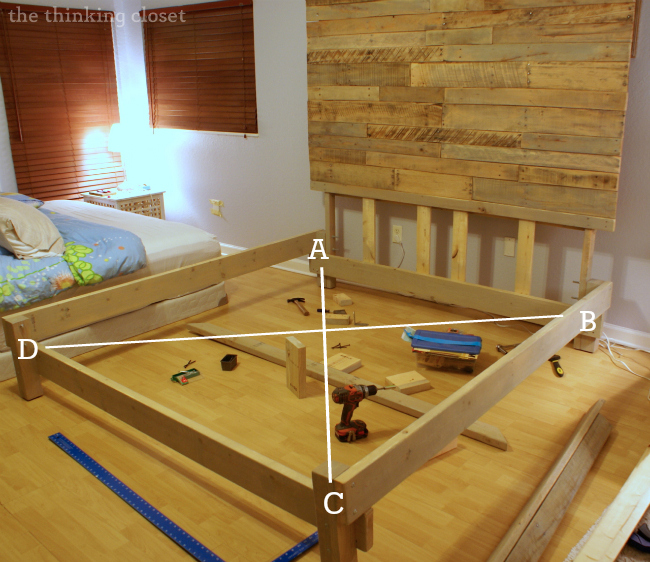
5. SQUARING. Before placing the left-right brace (when the bed frame is still just an open rectangle), you need to make sure the bed is a rectangle and not a parallelogram (perhaps you haven’t heard these words since 9th grade geometry?). Another way to say it is that you want all 4 corner angles to be 90 degrees exactly.
The easiest and most accurate way to do this is measure diagonally corner to corner. A to C distance should be equal to B to D distance. If they are not, you and a helper will pull the 2 corners apart, pulling at the 2 corners that had a smaller distance. Then, remeasure and repeat until it is square.
6. BRACING. When you are sure it is square (I can’t over-emphasize how important that step is), go ahead and place cross-braces and tighten up all bolts. You can brace in a variety of ways, and it only matters that in the end, the bed feels solid and does not shift… here’s the way I did it:
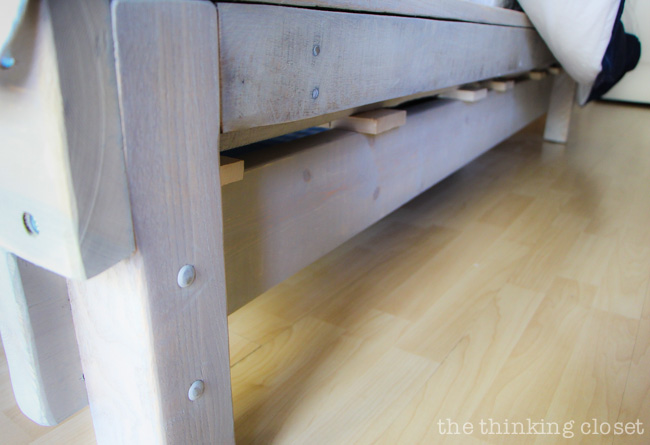
I cut a 2×4 just long enough to catch the 2 side rails, and set this vertically (like a roof truss) underneath the side rails. I later added a 5th post to this brace (see step #10), but for right now, just put in the left-right brace with no center post. I placed 6 of the 1x4s perpendicular to the headboard and fastened them down with screws. These will be the pieces that the box springs will lie directly on. Again, it doesn’t matter if you brace it how I did, as long as it ends up rock-solid.
7. JOINING. You will have assembled the headboard separately (tutorial to come). Now, it is time to join them. A helper is key for this part and definitely use your clamps.
Back the bolts up so that the ends protrude to the outside and there’s no extra bolt hanging over on the inside of the post.
First, the 2 of you should raise the headboard upright, standing it on its legs (made of a 2×3). Clamp the legs firmly onto the posts at the head of the bed. The holes at the bottom of the legs were drilled ahead of time to match up perfectly with the 2 legs at the head of the bed. Using the larger bolts (⅜ by 6.5), which are already through the bed post and side rail, advance the bolts through all 3 pieces, and replace the washer and hex nut, tightening them loosely with a couple turns of your wrench. A socket wrench is best if you have it.
8. SQUARING. Squaring again? Yes, now the headboard must be squared up with the bed frame. If you have a large square, great, but you could also use anything large and square, such as a floor and wall (if you are certain they are 90 degrees) or a piece of foam board or large book.
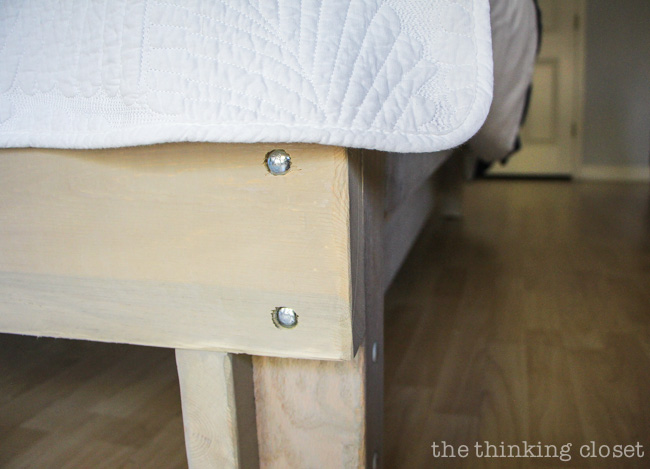
Have your helper push or pull until it is perfect, then hold in place while you tighten up those 4 bolts. Whether you are using a nut driver or a wrench, you are going to want to turn until the carriage bolt head is pulled into the wood and the washers likewise are crushed into the wood on the side you are tightening. When you hear the sounds of wood crushing, you’re on the right track. Give it another turn or two.
9. BRACING ROUND 2. Before placing the box springs and mattresses on your frame, walk all around the bed and make sure everything is sturdy. Lean, push, pull, and stand on the horizontals. If anything is not sturdy enough, add bracing (keeping in mind that it cannot get in the way of the box springs).
You may even need bracing for the large right angle formed by the headboard and frame. Alternatively, if you make the 4 bolts tight enough, it may give you enough stability without braces.
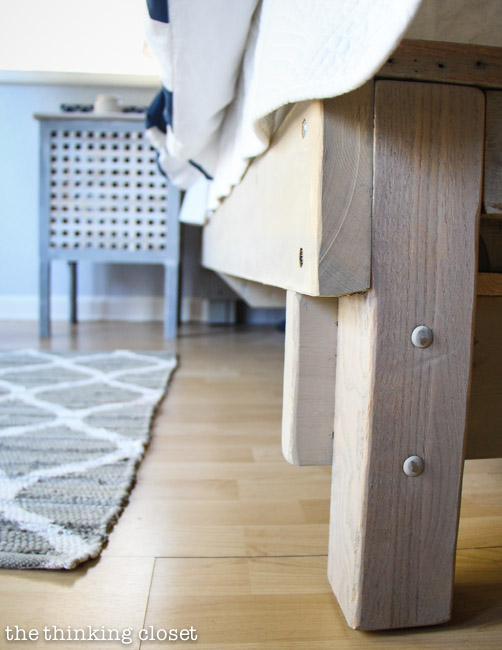
10. SUPPORTING. For a large bed like a king, you will probably want a fifth post in the center. You can attach this post to the 2×4 (left-right brace). Now, the key to a good 5th post is that you need to fasten (2) 2×6’s together, with one of them long enough to fasten to the 2×4, and cut this newly created post about 1/4″ to 3/8″ too long.
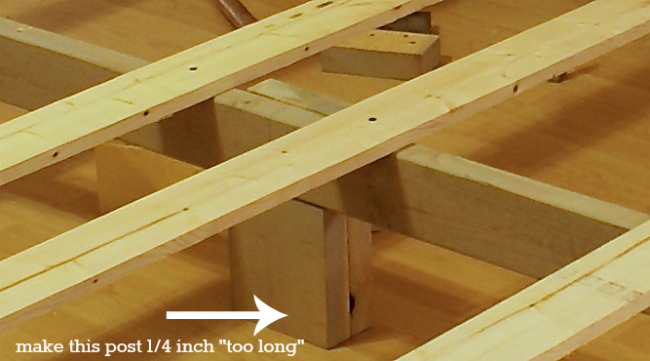
I think it works better if you do this 5th post as step 10, rather than with step 6, which is why it is here. The reason is this: with the headboard joined to the bed frame, you will find that placing the 5th post causes the two posts at the foot to hover just above the floor. That is good. That is what you want. Within a few days the boards and bolts will “settle,” and you’ll end up with all 5 posts on the floor and the weight distributed properly.

Coming Up Next!
Thanks, Mark! I think I need to let you take over the blog more often. Seriously, I could get used to this.
Alright, friends. I hope you have a fabulous weekend. I’ll be back on Monday with a video tutorial, yup…a VIDEO tutorial…on my process of staining the wood on our bed frame. And it promises to be a grand time. Though I’ll warn you in advance, you may be blinded by the shine of sweat on my forehead because this went down in October, folks, and October was the height of our summer in Florida this past year. And I always save our biggest DIYs for the height of summer. {Smile.}
Rustic Nautical Master Bedroom Makeover Series
And if you’re just tuning in, be sure to check out the other posts in this series!
Ciao!
Original article and pictures take www.thinkingcloset.com site
Комментариев нет:
Отправить комментарий