|
|
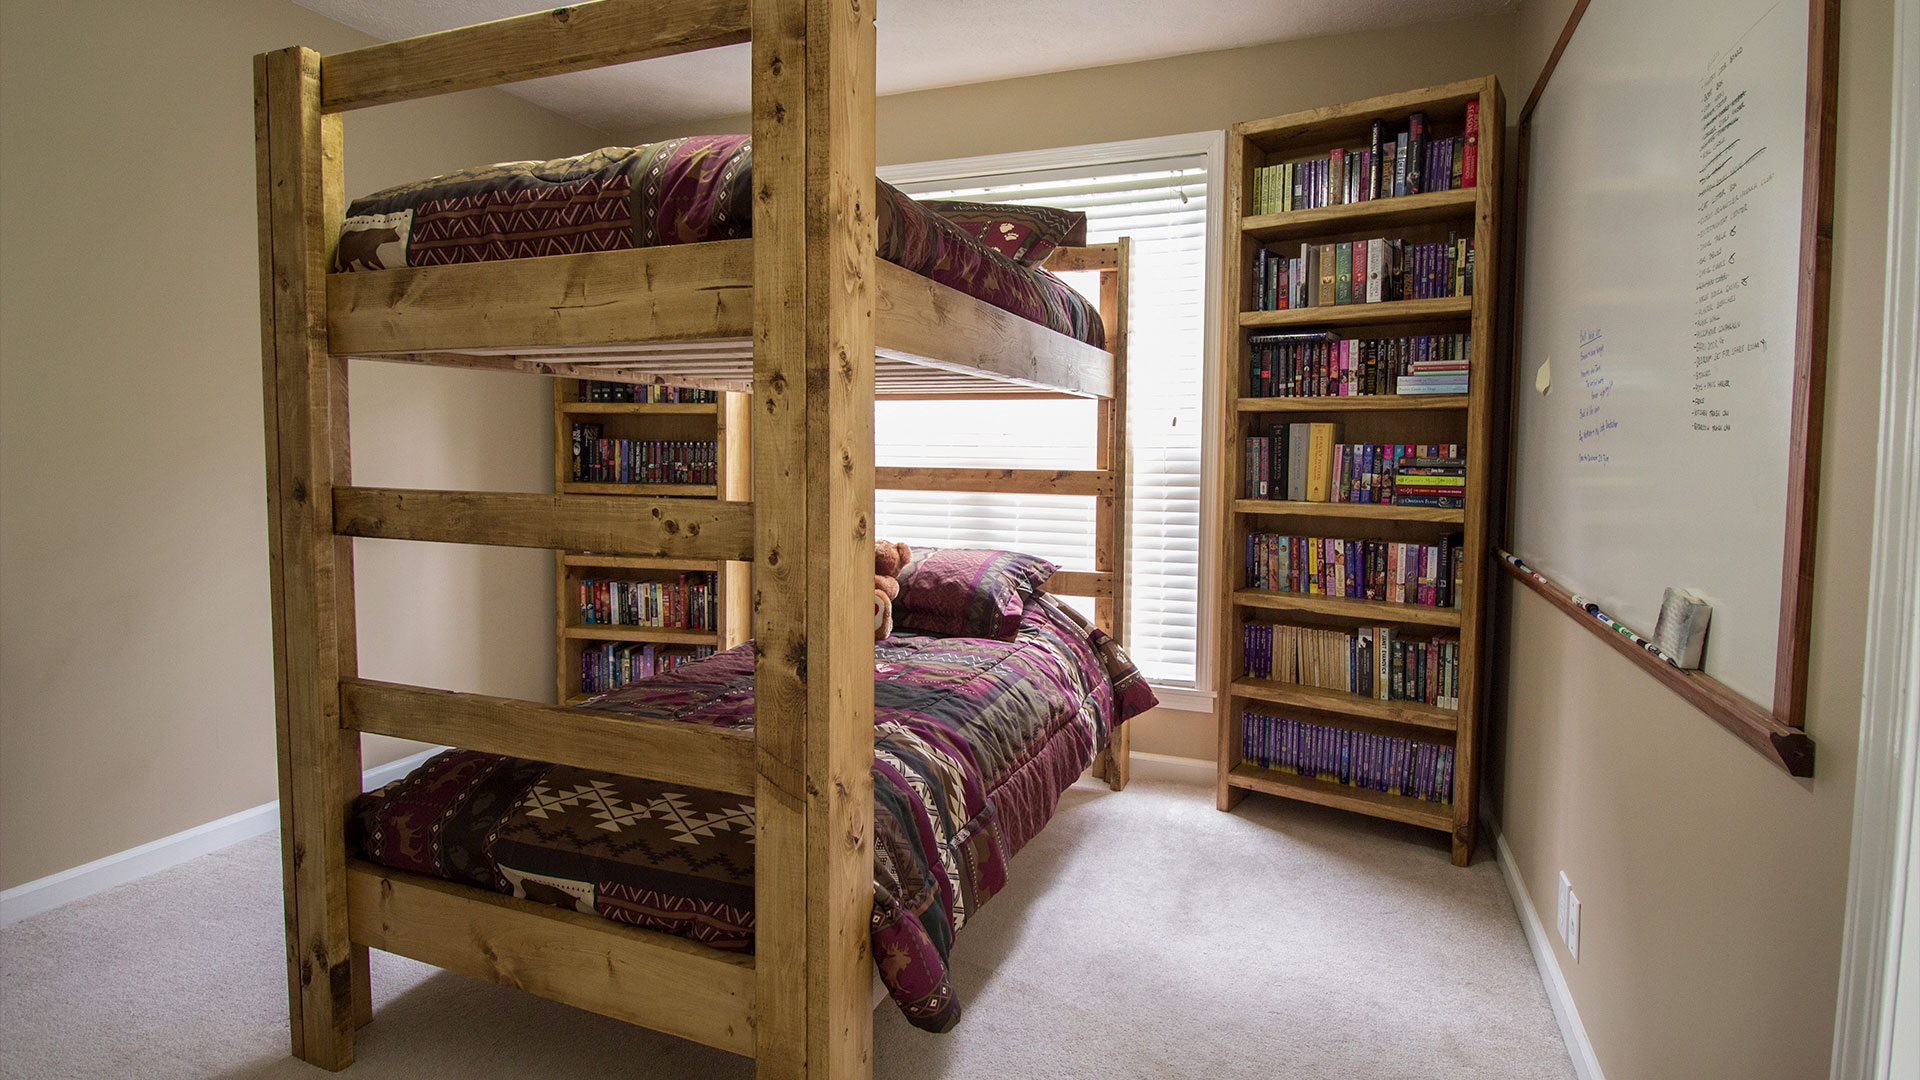
Since buying our house my wife and I have decided to not purchase any more furniture. If a furniture need arises we will (I will) just make what we want instead of buying. Due to the possibility of family visiting for the holidays a bunk bed for our spare bedroom instantly jumped to the front of the line.
The bunk bed design I went with is one that I’ve previously built before. I’m not 100% sure but this one is either my fourth or fifth of this design. All have turned out great. What I really like about this bunk bed is that 100% of the fasteners are on the inside of the bunk bed. This means no unsightly screw heads or carriage bolts that you traditionally see with bunk beds are visible on the outside. Also, the materials list is nothing but 2x4s and 2x6s which means the vast majority of people out there will have access to the materials. My materials cost was about $135. I do have a detailed plan available for this bunk bed available at the bottom of this article. UPDATE: This is one piece of an entire bedroom set. If you are interested in plans for the entire set CLICK HERE.
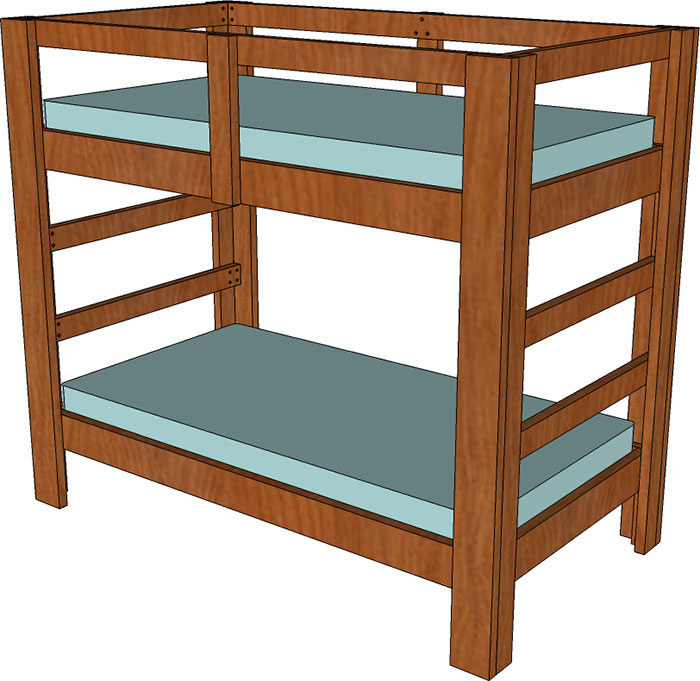
The bed frames need to be built first because their overall width determines the length of the ladder rungs. Regular construction grade pine 2x6s are cut for the frames.

I’m trying to achieve an aged look with the finishing process so I don’t need to be super critical when sanding. I don’t want everything to be super smooth but I do want to remove the manufacture stamp marks.

So to make the process much faster I decided to use my thickness planer instead of sanding. Just a few slight passes to remove the stamp marks.

The frames are joined together with wood glue and pocket hole screws. These will be hidden by the mattresses and nobody will ever see them.

2×2 material is needed for the slats to rest on in this bunk bed. For me it’s cheaper to purchase 2×4 stock and make my own 2x2s so that’s the route I went.

These are glued and screwed to the inside of the bed frames.

Typically when you see removable bed slats they are either 1×4 or 1×6 material. For a twin size mattress those sizes are definitely acceptable. But again this was an area where purchasing regular 2×4 material was less expensive per linear foot than 1×4 material. To reduce a little thickness and also create a spacer block a rabbet is cut on each end of the slat material. I slapped together a couple jigs to show you how easy it is to make these cuts with a circular saw if that’s the only saw you are using for this project. This first jig will make the 1/2” deep cut.

And this second jig will make the second cut of the rabbet. It’s just a piece of plywood with a spacer clamped to the end of the slat to position the circular saw blade 1/2” into the material. The resulting cut creates the rabbet on the slat and the offcut will be used in a later step.

I made those two jigs for the sole purpose of showing you that you don’t need an expensive bandsaw or table saw to complete this project. Technically every cut on this project can be made with a cheap circular saw. However, that was just a demonstration. I used my bandsaw to make the remainder of the rabbet cuts.

The first slat to go in is the center slat. It’s also the only slat that is secured with screws. The rest of the slats will be floating in place.

Next, all of the offcuts were glued and tacked with a couple brad nails. A scrap piece of 2×4 was used as a spacer block. The only purpose these serve is to keep the slats from sliding around over time.

With the frames done I could focus my attention on the legs. Each leg is a L shaped formed by securing a 2×4 to a 2×6. The 2×4 will receive the pocket holes. The spacing of these pocket holes is critical though. Not necessarily for strength but instead for appearance purposes. These needed to be placed so that they would be covered up when installing the ladder rungs.

I didn’t realize it until I had already built my legs but the 2×6 stock I purchased was a little less than perfect. Most of it had a bunch of machine roller marks on the ends. To remove them I used my block plane but now that I think of it I should have just ran the assembled leg through the table saw to remove a saw blade width from the bad side.

The ladder rungs were cut next. Because I planed down my frame boards I actually lost 1/8” in width for the ladder rungs. They will be secured to the 2×4 side of the legs to cover up the pocket hole screws. I used a couple spacer blocks to indicate where I could predrill holes.

Glue and screws secures the ladder rungs to a left leg to a right leg. The only thing to be concerned with here is to make sure the ladder rungs stay perpendicular to the legs.

The final pieces were the frame locating blocks. These will support the bed frames at the proper height during assembly. One block was used for every corner of each bed frame.

I thought I was going to have my hands full with assembly but it ended up being super easy. To start I slid one side of the lower bed frame into place and used a quick clamp to hold it in place. Then did the same to the other side and held it with a clamp too.

Because the clamps were the only thing holding the lower frame I could set the top bed frame in from above and slightly push out one side to get it in place. Again, a pair of clamps to hold everything in place as I screwed it down.

This may seem a little overkill but I don’t think it is. Each inside corner of the bed frame receives 8 screws to mount the frames to the legs. Two into the 2×4 side of the legs and six into the 2×6 side of the leg. This grid of screws creates a lot of conflicting geometry that will prevent racking of the entire bed. This may be a tiny bit cumbersome to remove all of the screws when moving the bed but for a furniture item that will spend 99.99% of it’s life serving a purpose and not in transit I think it’s just fine.

Finally the remainder of the slats can be installed. These slats are really strong. I weigh 190 pounds and put all of my weight on the center of one individual slat with no problems at all. I have no clue what the max capacity of this bunk bed is but it’s got to be a lot considering all of the weight will be distributed amongst all of the slats and then to all four of the legs.

Because both ends are the ladders themselves it doesn’t matter what way you position the bed. You can get on top bunk from both sides. As you can see I didn’t put the guard rail on the top bunk. That’s a personal choice to make but for those who are interested one is included in the plan.

I didn’t apply any finish to the bunk bed just yet. I wan’t to experiment with a steel wool, vinegar, and briwax finish so that will be for another day. I hope you were able to find some inspiration in this project and are able to make one of your own. This is a really inexpensive build and a solid design that will last for years and years. Regardless of if you use my bunk bed plan or someone else’s I wish you luck with the build! Building it yourself is incredibly rewarding, you will get a much better product, and will save you a lot of money. Take care folks.


Original article and pictures take jayscustomcreations.com site
Комментариев нет:
Отправить комментарий